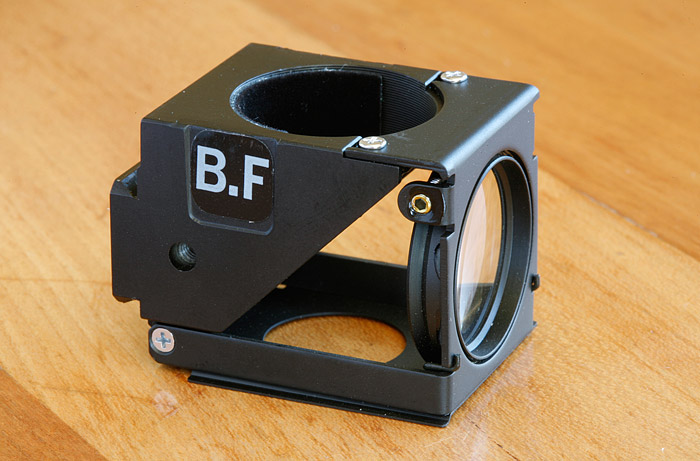
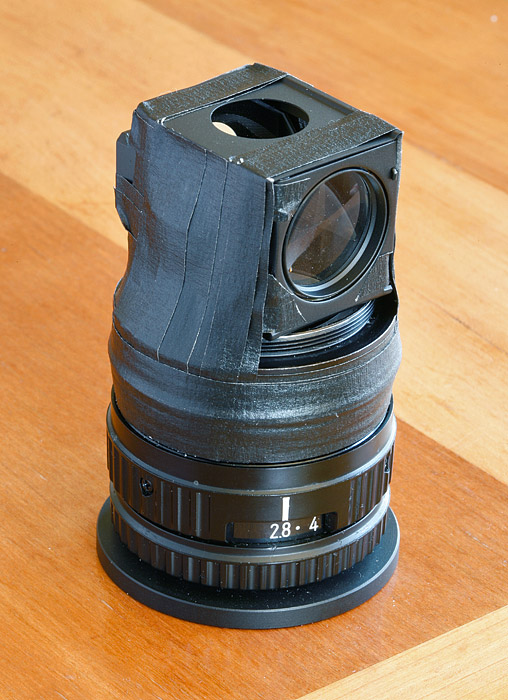
I took a brightfield "cube" for the Olympus BH2-UMA vertical illuminator and attached it to a reversed 63/2.8 El Nikkor.
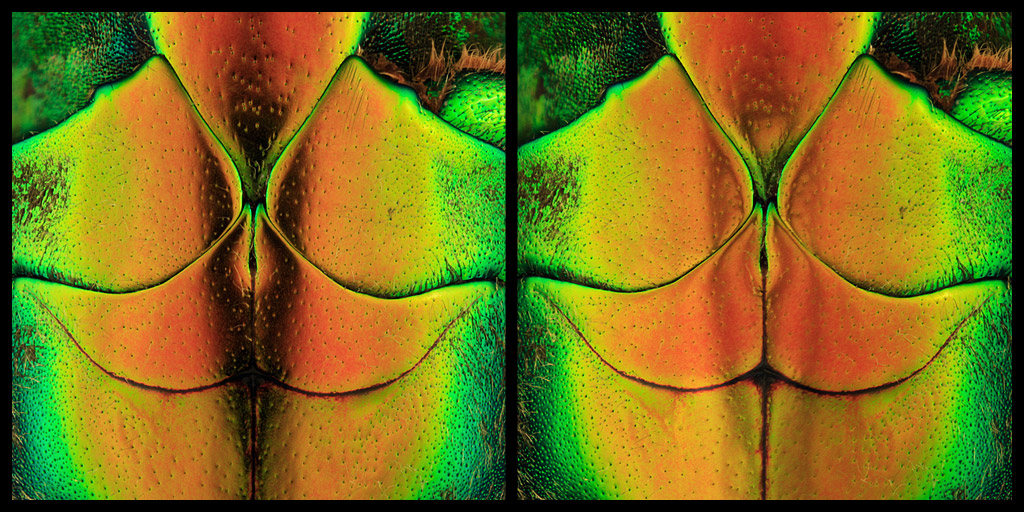
Then I did a quick test. (Nothing fancy here, I just placed a beetle on the stage). It was illuminated with a translucent white dome, as I might ordinarily do with such a subject.
The top shot shows the "black hole" which is the reflection of the hole at the top of the dome and the lens looking through it. (It appears proportionately larger than it normally would in a "real" picture since I have cropped in on it significantly).
For the second shot I added some light through the brightfield cube to try to fill in the dark area. (I placed a couple layers of diffusion material over the light entry "port" to try and avoid harsh, focused light). The results were moderately successful. It's hard to eliminate the dark effect completely. If you crank up the light through the beam splitter too much you start to add noticeable (direct, frontal) light to the overall picture and begin to lose the nice diffused dome lighting. Shadows start to get get filled in and texture starts to become less pronounced. You begin to get undesirable reflections from the direct light. The best compromise seems to be a point where the dark area is filled in significantly, but the beam-splitter light adds very little to the overall exposure. The exposure used was was exactly the same for both images (1/6 second for each image in stack), and no adjustments were made in "post". So you can see that even though the dark areas are not entirely eliminated, there is starting to be hint of additional overall exposure to the full image. (Also notice how the small dark depressions in the surface of the beetle that face the lens are starting to be filled in with light).


This two-panel shot below shows, on top, the picture made with no additional light from the beam-splitter. The lower panel shows only the light that was contributed by the beam-splitter. (The end result of this added light is the second picture of this post).
(Rik... I suspect you might be tempted, but don't try to split them up and layer these, this "two panel" example was an afterthought so the cropping and sizing is not exact