
This is based on previous setup detailed in these threads:
- http://www.photomacrography.net/forum/v ... php?t=6988
http://www.photomacrography.net/forum/v ... php?t=6756
http://www.photomacrography.net/forum/v ... php?t=6411
- 12"X18" 80 pound granite base
Heavier aluminum extrusions
XYZ and rotation subject stage
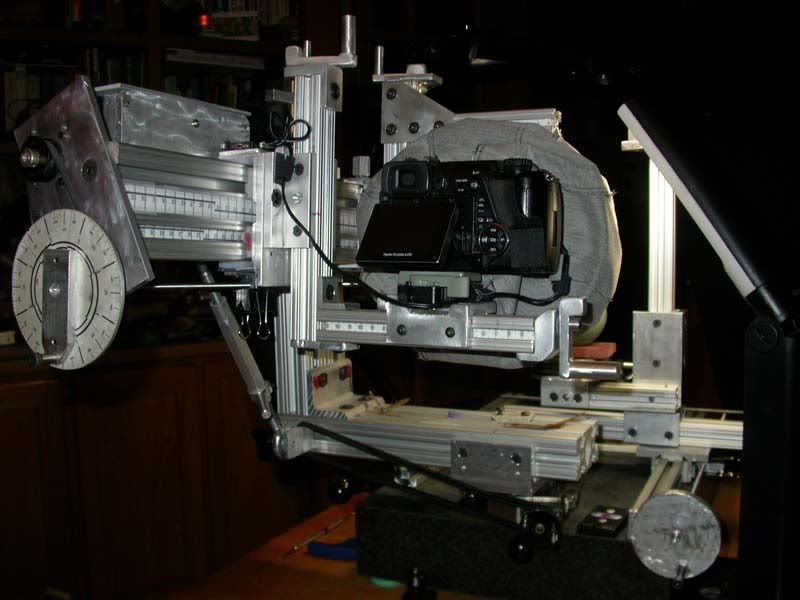
Rotary table base for the camera side
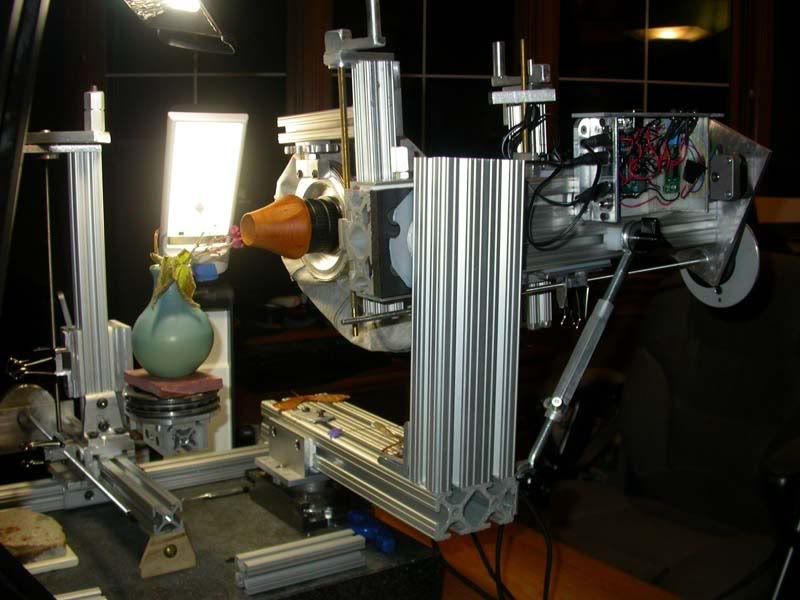
Bellows draw increased to 300mm
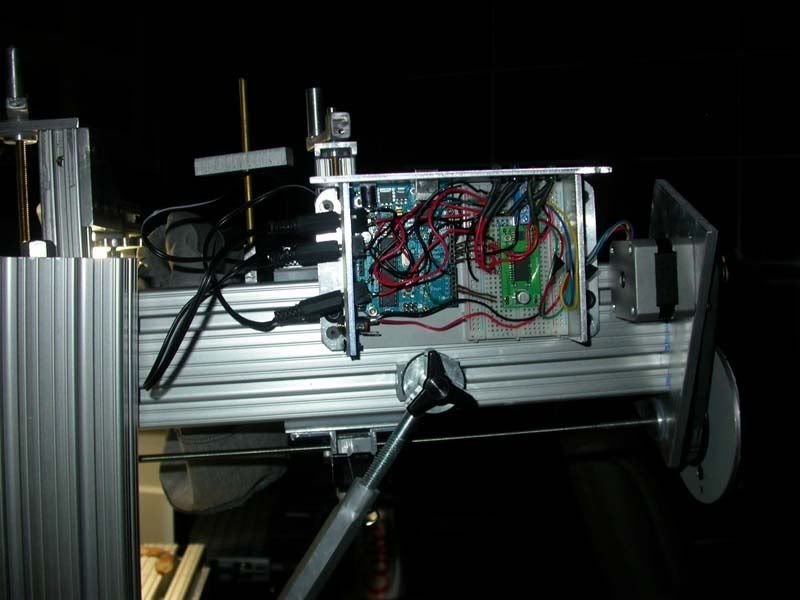
Microprocessor control of the bellows draw
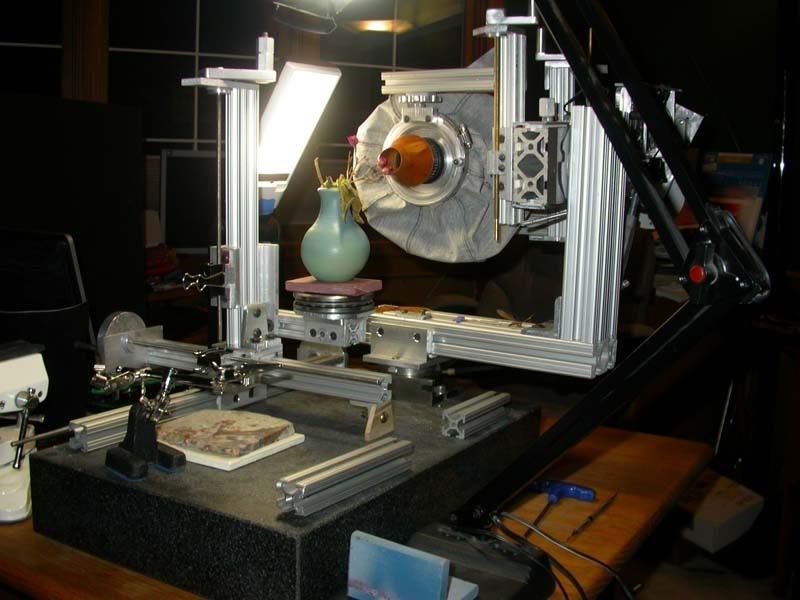

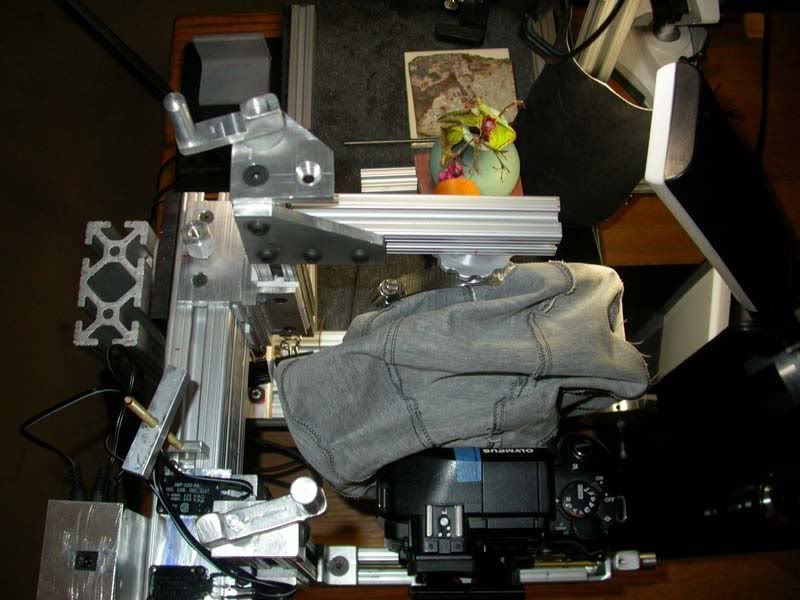
The granite block is resting on 4 small rubber balls which eventually will be replaced with sorbothane hemispheres to better isolate it from external vibrations. It does move pretty freely on the rubber balls, so touching the setup while taking an image is not advisable.
The X, Y, and Z axes are controlled with 5mm X .8 leadscrews. A split nut is used on each axis so each can be rapidly moved manually. The rotation axis is currently manual. The stage is only used for initial positioning of the subject. The focus steps are done by changing the bellows draw.
With the addition of the stage, it was no longer necessary to have a tilting camera base. The rotary table was added to give a little smoother control over the rotation of the camera base. Unfortunately, it has quite a bit of backlash in it, but this is fairly well controlled with a bungee cord. The rotary table is scheduled to be replaced with a stepper motor controlled rotating base which should take care of the backlash problem.
The camera arm can be rotated down about 30 degrees and rotated up 90 degrees. I've removed the capability for camera swings and tilts as I found I wasn't using them for macros. The biggest problem was the small Live View screen just didn't have enough resolution to get the focus perfect. Focus stacking, on the other hand, is more tolerant of focusing errors. You just need to make sure the start and end points cover the focus range desired.
The stepper motor is controlled by an Arduino Duemilanove microprocessor board and an EasyDriver stepper driver board.
The stepper motor does 1600 microsteps per revolution and is further reduced with the belt drive and pulleys to 3200 steps per revolution. With the .8mm pitch of the leadscrew, each step is .00025mm, but it's unlikely to be that accurate due to stiction and friction. I'm also using the Arduino to trigger the camera shutter via IR. The main reason for this, is the Olypus SDK doesn't allow saving images to the camera. The download time for each image is 20+ seconds. By using IR to trigger the shutter, images can be taken every 8 seconds.
I've seen a big reduction in vibration problems by using the granite block and hands-off with the Arduino and stepper motor. Next on the agenda is fitting a Nikon BD Plan 10 microscope objective.


