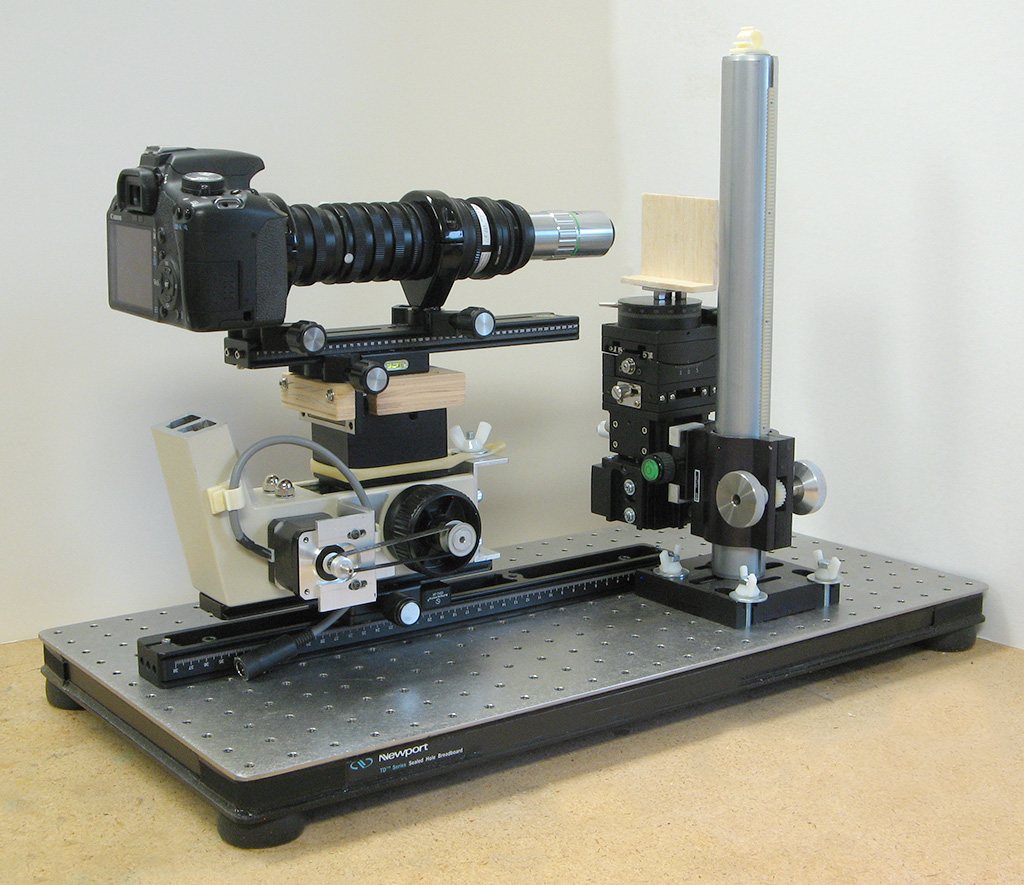
Starting from the bottom, this consists of:
1. Block of wood with Arca rails screwed to it on several faces
2. Lift-type linear stage (Y axis for a camera in landscape orientation)
3. Horizontal linear stage (X axis for a camera in landscape orientation)
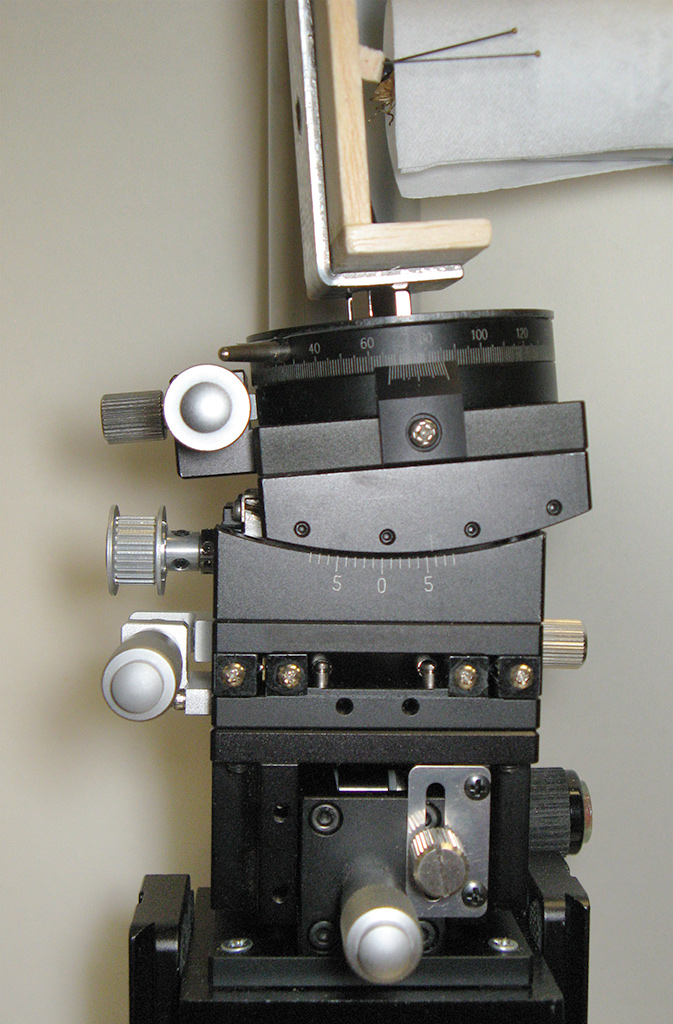
4. Goniometer, small angular travel with large radius
5. Rotary table with steel plate added on top
6. Several 1/4" magnets
7. L-bracket of steel, with balsa plates glued to it
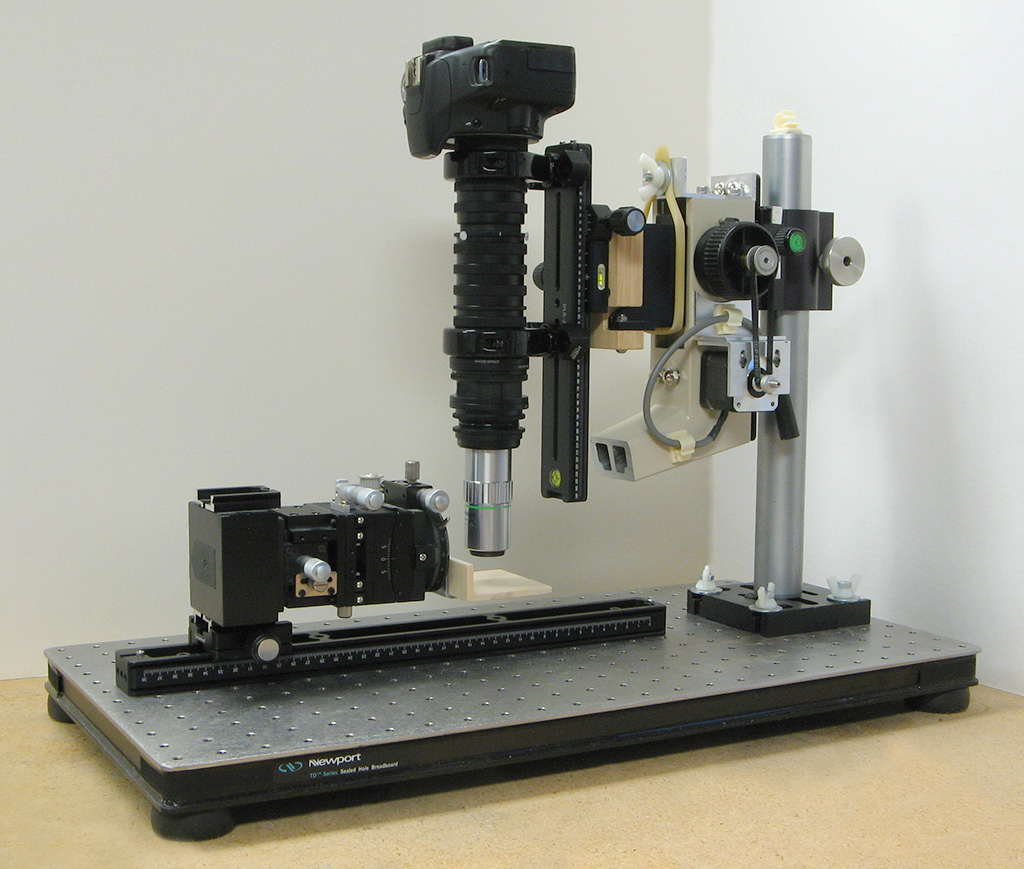
As workflow, what I do is to pin my subject to the balsa plate so that the area of interest lies near the height of the rotational axis of the goniometer and is tilted close to what I want. Then I slide around the L bracket that is magnetically held to the rotary stage, until the area of interest lies near the axis of the rotary table. Working in live view, I then turn the controls of the positioning stack so as to center the area of interest and tweak up the angular alignment. Because the subject is located very near the centers of rotation, adjusting the angles has only a small affect on framing and focus.
Configured as shown here, the background for the subject would be mounted on the balsa plate, only a short distance behind the subject. If I want clear space behind the subject, then the rotary table gets spun 90 degrees so that the camera looks past it. Or maybe the L-bracket with balsa plate gets removed altogether, and some other subject holder gets stuck down with magnets instead.
The ability to slide holders around with magnets on the steel plate is surprisingly helpful. It reminds me a little of the "gliding stage" concept that I've seen used with stereo microscopes.
Note that this setup uses only one goniometer, not a matched pair. I don't think there's any loss of functionality, compared with using two goniometers. The two axes of rotation associated with getting the subject parallel with the sensor are provided by the goniometer and the rotary table. Rotation of the image within the frame is done by rotation of the tube assembly in its holding clamps, with the camera hanging off the back. (Tube and camera not shown here.)
As always, I make no representation that this is the best way to do things, only it works well for me. Hiding behind the diffuser shown above is a 50X objective, imaging a roughly 0.44 mm x 0.3 mm section of stink bug. Yesterday the same space was occupied by a 100X objective, imaging about 0.22 x 0.15 mm. Shooting at such high magnifications is close to impossible without some sort of fine mechanical control.
If I recall correctly, I bought the two linear stages and the rotary table new on eBay, and paired those with a used goniometer that I had picked up earlier. These are 60mm x 60mm bases.
I have not been able to find a new goniometer like this, made by any of the inexpensive Chinese manufacturers on eBay. Perhaps somebody else knows where they can be found?
--Rik