rjlittlefield wrote:Clever device!
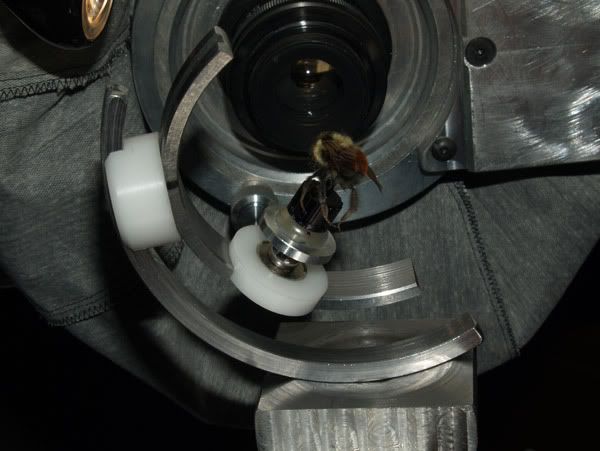
I can't help noting that position and orientation of the subject is uniquely identified by X, Y, Z, pitch, roll, and yaw --- only 6 parameters versus the 11 degrees of freedom provided by this gizmo plus the XYZ stage it's mounted on. Have you used the device enough yet to know how much help the extra degrees of freedom provide, or did they just come "for free" as part of the design?
--Rik
I really haven't used it very much actually taking pictures, but the X, Y, Z axes of the main stage are just used to get the rotation point aligned to the axis through the lens. The 4 axes at the ball joint are primarily used to get the subject centered at the rotation point, but at lower magnifications they can also be used for orientating the subject. At higher magnifications, I think only the other 4 axes would be used for subject orientation.
johan wrote:The rotating assembly directly below the bee, can I ask, what parts did you use for that? Do those, and the plastic bits, have a specific name that I can use to google and source them online? Googling "plastic sliding thingie" or "rotation widget" doesn't get me all that far =)
Thank you very much
Edited: found it I think. Spacer or bush, with a groove cut into it, cheap as chips on ebay. Now to find a small rotater thingie.
I think 'plastic sliding thingie' will be the official name for them

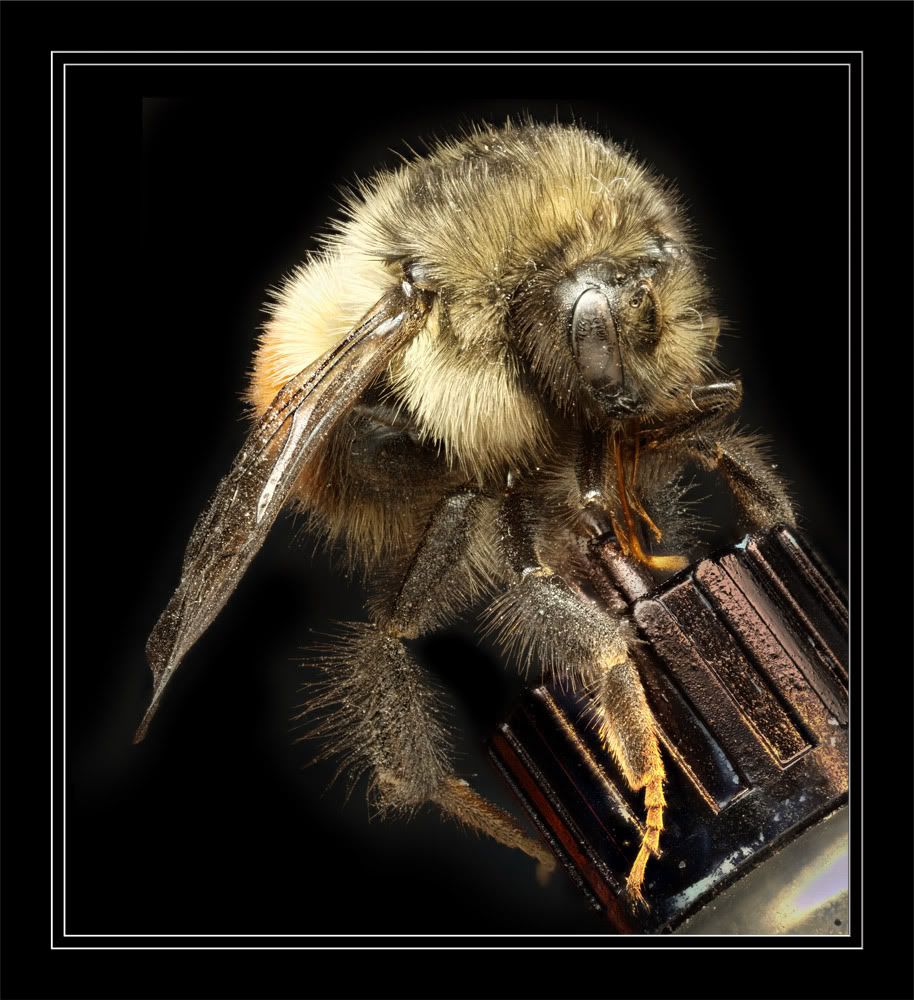
I don't know if you will be able to find something suitable. I machined these from a Delrin rod. Delrin is easy to machine and you can use normal woodworking tools on it. The needle assembly is from a syringe. It takes up a little too much space, so for this size insect, it's not possible to keep it out of the picture. It will probably work well on a mosquito sized insect. Perhaps a cork with a regular insect pin would be better than the syringe.
ChrisR wrote:For a first try at darkening the surface, "gun blue" seems to do a pretty good job. I just found a product called "Sight Black" which claims to leave a dull finish.
That's definitely another option. I think it will be easy to add a ping pong ball diffuser or holders for other backgrounds as well.
ChrisR wrote:
I keep thinking of Panoramic Tripod Heads, which of course allow rotation around a fixed point. eg
here. I don't have one.
For holding larger subjects, they appear to be potentially useful.
For holding the camera with a low profile macro rail aboard, they look as though it should be possible to do macro panoramas. You must have tried a few Ed? Is there a best type? About where do the limits come, before they won't do the job, for which you made your intriguing camera-positioning animal?
The lens has to remain stationary, so changing the focus needs to be done by moving the camera. This means, you'll need a bellows unit as well as the macro rail. I don't know if any of the sub $500 pano heads would be able to support (or be rigid enough for) a StackShot plus bellows setup. Even the StackShot isn't designed for just moving the camera side of a bellows unit, although it probably wouldn't be that hard to make a custom mount on the StackShot to do this.
My first pano head made from aluminum extrusions used a 1"x1" extrusion. This was ok for landscape work where I was only taking 30 to 50 shots. It was much too flexible for macro work. The current macro setup uses a 1.5"x3" extrusion, which seems to be rigid enough even with all of the cantilevers.