At the moment, this is really supporting material for another discussion, but I'm creating it here as a separate thread because it'll be so long.
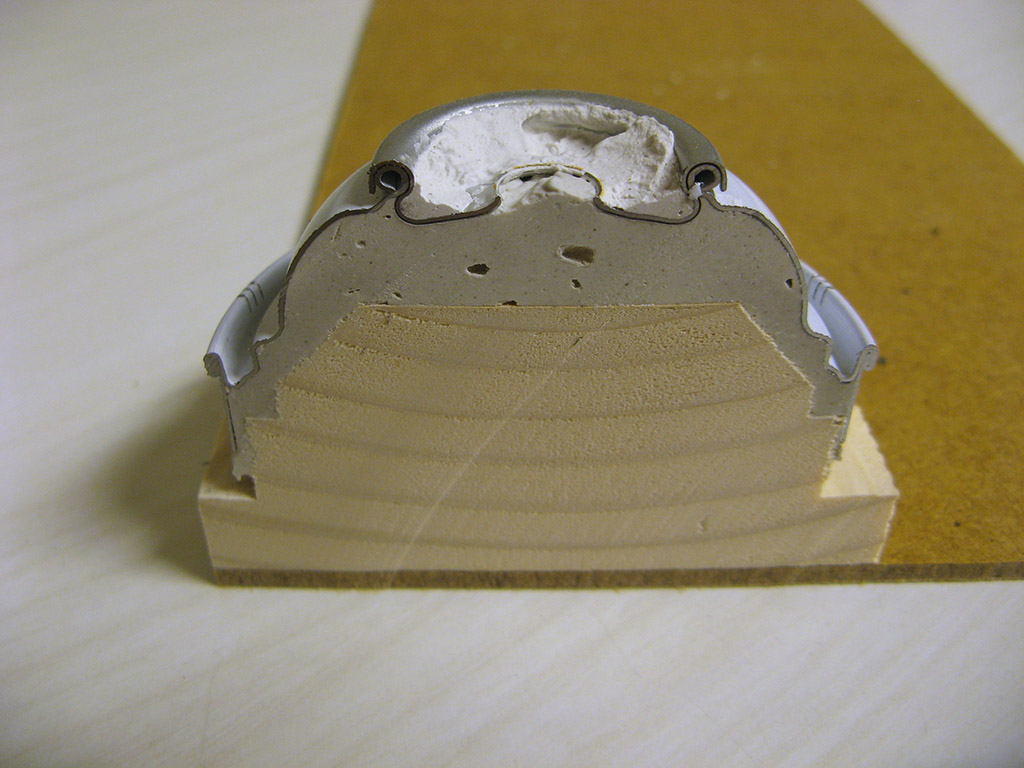
Background is that I want to photograph a cross section of the valve mechanism of a pressurized can of whipped cream. So, after eating all the whipped cream (waste not, want not!), I teased the plastic valve parts away from the can, prepared the can itself for sectioning by fixing it on a wooden form with plaster of paris, then sliced apart the whole assembly using a carbide tipped blade on a table saw.
While I was doing this, I snapped a few pictures of the process and the result at a variety of magnifications ranging down to about 6.5 mm field width (corresponding to 45X magnification if the full frame were printed at 8x12 inches).
Here's the setup I used for high-mag work. It's just a Canon T1i camera with a Canon 18-55 mm kit lens reversed on front, stopped down to f/11 and used as described HERE. The magnifications in this thread are a little lower than in the other one because I'm using here a thinner reversing ring (HERE, plus a step ring to fit the lens). None of the photos in this posting used any sort of focus stacking or holding jigs. At most, the camera was steadied on desktop while I focused using Live View.
These overview pictures were taken with a Canon A710 IS point-and-shoot in macro mode, available light.
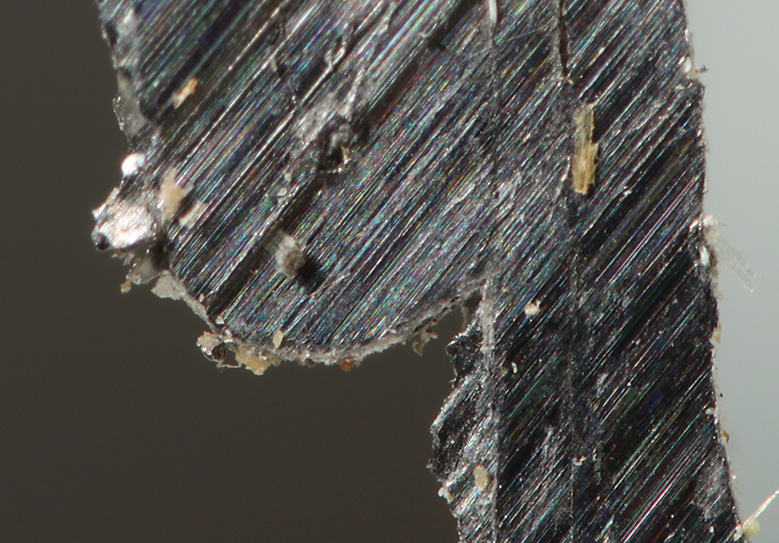
Crop from the above. Note the wood fibers stuck on the blade tooth from earlier sessions of cutting wood, and not scraped off due to clearance ground into the tooth shape.
The resulting section:
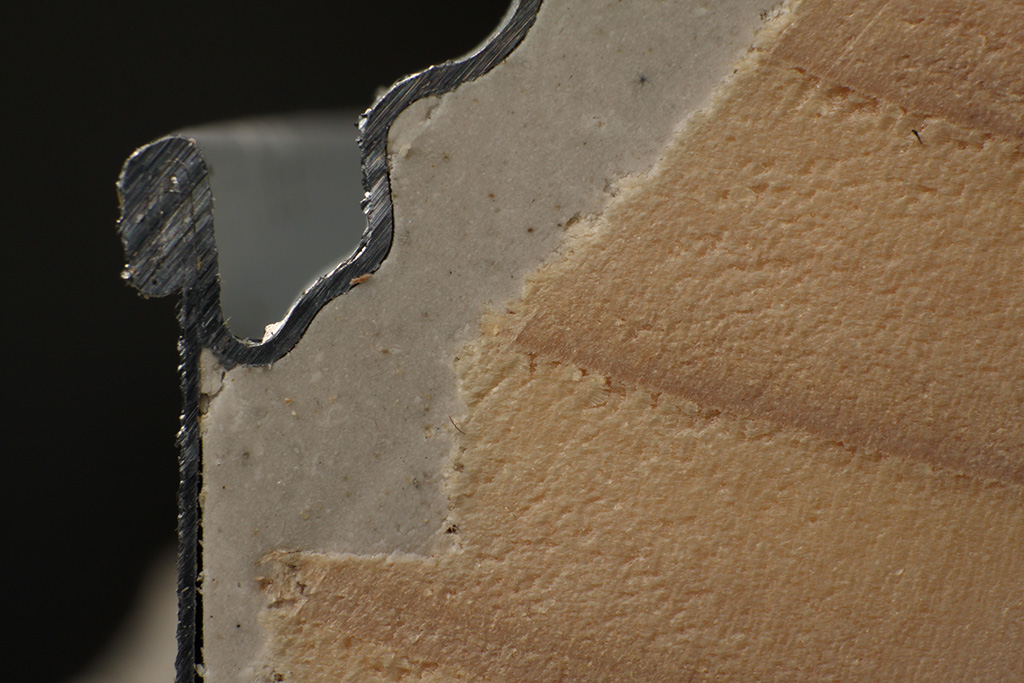
Some closer views of the tool and the section, shot with the T1i. All are full frame unless labeled as crops.
Following is at the highest magnification I can get without adding extension to the reversed lens. Note that only the bottom of the subject is in focus, due to slight misalignment of the camera and section plane.
Crop of the above:
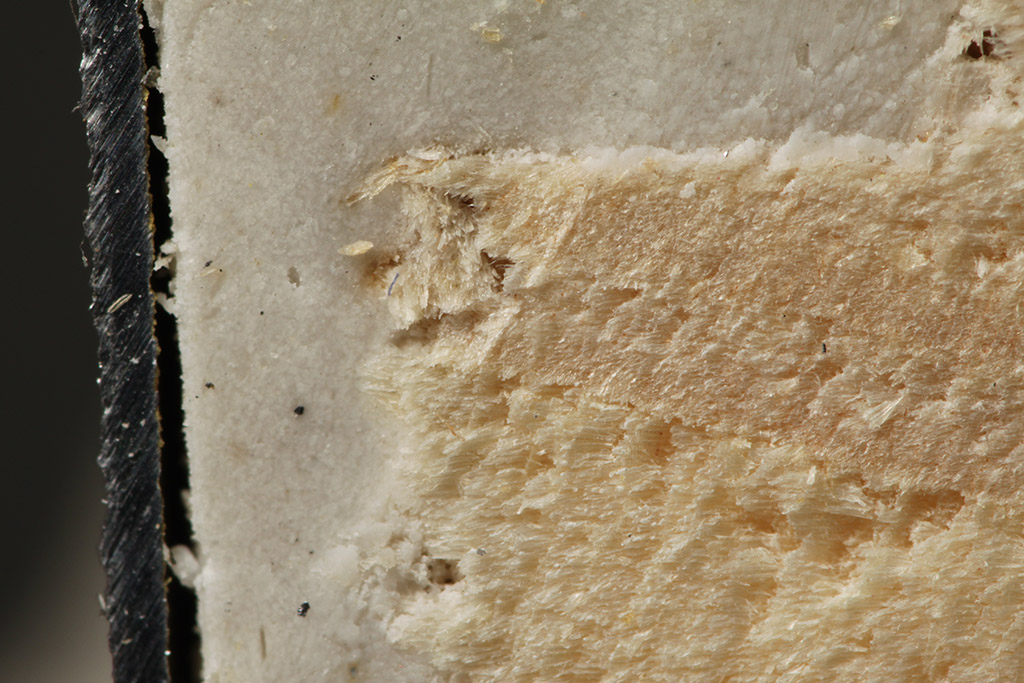
Following is full frame at the highest magnification (corresponding to about 45X in an 8x12" print).
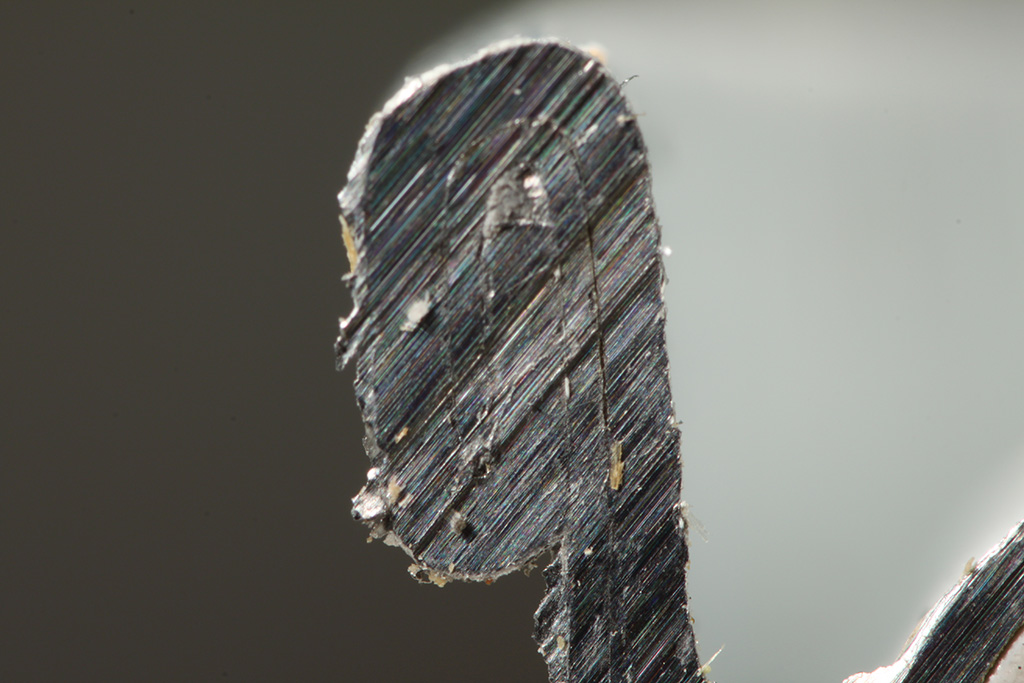
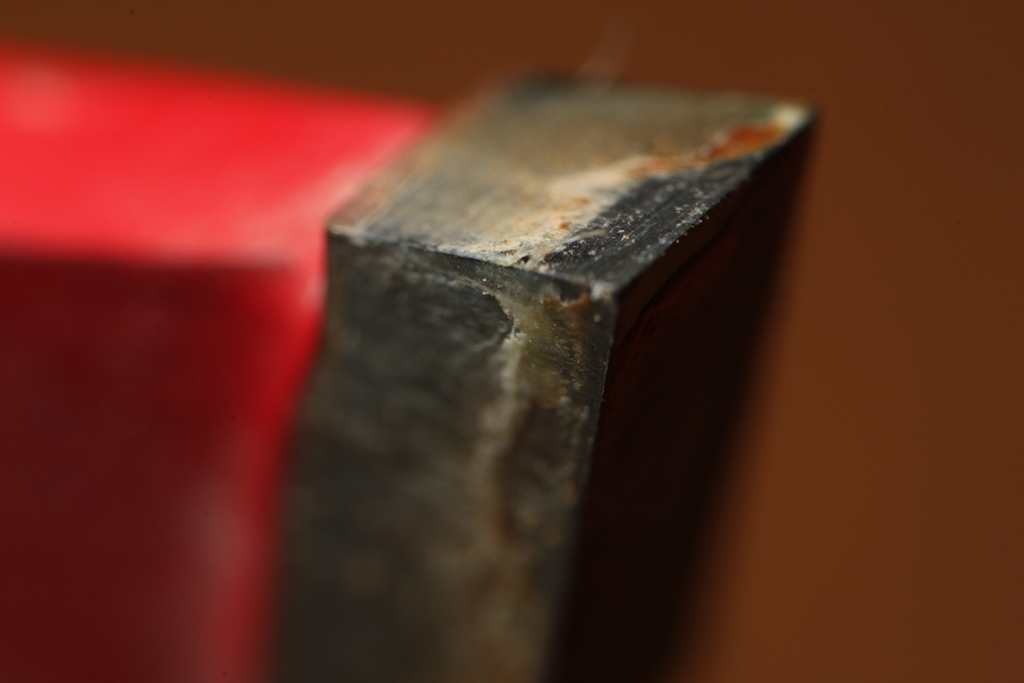
Finally, one tooth from the saw blade. In this image you can see the extremely shallow DOF that goes along with high magnification.
Hope this is useful to somebody!
--Rik
Slicing open an (empty) can of whipped cream
Moderators: rjlittlefield, ChrisR, Chris S., Pau
- rjlittlefield
- Site Admin
- Posts: 23625
- Joined: Tue Aug 01, 2006 8:34 am
- Location: Richland, Washington State, USA
- Contact:
- rjlittlefield
- Site Admin
- Posts: 23625
- Joined: Tue Aug 01, 2006 8:34 am
- Location: Richland, Washington State, USA
- Contact:
Simple curiosity, and expecting the effort to turn into an interesting learning experience.g4lab wrote:Why did you want to saw open a whupped cream can? If I may ask?
The curiosity part is "When you push the spout sideways to let the whipped cream out, what really happens inside the can?" The learning experience is because I've never done anything exactly like this before, and almost always that situation leads to some learning.
This is actually my second can. I butchered the first one with a hacksaw, sectioning down through an intact valve just so I could see how it was put together. That knowledge let me figure out how to disassemble the valve with the parts almost completely intact. (I had to slice open the outer plastic spout.) Then I contemplated how to cleanly section that complicated assembly of thin sheet metal. Potting the whole thing in plaster of Paris worked surprisingly well.
I can't remember how long you've been with us. Have you seen my investigation of how a side-cutting can opener works? (HERE)
The potentially useful part relates to Roger's interest in photographing lumber surfaces, HERE.
--Rik
Although it feels longer I have only been here since May 2008. The side cutting can opener thread was in 2006. I might have seen it when I joined because I
spent a couple of days going through the whole site. But I can't say I remember it.
I had a side cutting can opener but it has disappeared. It was from Switzerland. I believe it cut like the one you photographed but on the INNER side of the fold. Yours might have been handier because I presume the lid would have sat on the can if you wanted to put it in the fridge. On the one I had the cut lid would fall onto the contents and down into the can.
I wonder if I was using it incorrectly.
- rjlittlefield
- Site Admin
- Posts: 23625
- Joined: Tue Aug 01, 2006 8:34 am
- Location: Richland, Washington State, USA
- Contact:
I certainly found this post instructive, and filed the approach away for potential future use. My thought would have been to use canned insulation foam, rather than plaster of Paris--wonder if it would have worked. The wooden base is a masterful touch--likely made the sawing safer and cleaner.
Rik, what did you use for a saw--perhaps a bandsaw?
Also, the old link to the can-opener thread was new to me, and interesting also.
Thanks!
--Chris
Rik, what did you use for a saw--perhaps a bandsaw?
Also, the old link to the can-opener thread was new to me, and interesting also.
Thanks!
--Chris
- rjlittlefield
- Site Admin
- Posts: 23625
- Joined: Tue Aug 01, 2006 8:34 am
- Location: Richland, Washington State, USA
- Contact:
Don't know. I chose plaster because I wanted something that most likely had enough compressive strength to keep the metal from deforming. The foams I know about are all pretty soft.Chris S. wrote:My thought would have been to use canned insulation foam, rather than plaster of Paris--wonder if it would have worked.
Getting the metal off the form is another part of the puzzle. With the plaster, it's surprisingly easy. Just bake the thing for half an hour at 275°F. The plaster dehydrates & loses its strength so the metal is easy to get off even though by shape alone it's locked in place around that upper seal. With foam I guess I'd use a solvent. The stuff I'm used to cuts like butter with carburetor cleaner, even though it's resistant to most everything else.
Thanks, that was definitely the idea. This sort of job is one where I'd much rather stay far off to the side and in full protective gear. Sawing metal is almost never a problem, but this was a new setup.The wooden base is a masterful touch--likely made the sawing safer and cleaner.
Just what's shown -- a 10" carbide finishing blade on a table saw. I thought about using a bandsaw, but figured I'd get a cleaner straighter cut from this thing. Yeah, I know the blade's not rated for any sort of steel, but this stuff's softer than some woods I've run into. It has to be, to form those cute little wrapped seams.what did you use for a saw--perhaps a bandsaw?
Edit: Oh, maybe you meant to make the base? Turned that on a lathe.
--Rik
Sorry, Rik. You're giving me too much credit--it was just a dumb question. Had looked at the thread earlier, gone off to do other things, and on returning, mentally assigned the images of the saw with your older thread involving wood grain. Perhaps my brain stuck a label of "wood blade" on your saw, and then misfiled accordingly.rjlittlefield wrote:Just what's shown -- a 10" carbide finishing blade on a table saw. I thought about using a bandsaw, but figured I'd get a cleaner straighter cut from this thing. Yeah, I know the blade's not rated for any sort of steel, but this stuff's softer than some woods I've run into. It has to be, to form those cute little wrapped seams.what did you use for a saw--perhaps a bandsaw?
Edit: Oh, maybe you meant to make the base? Turned that on a lathe.
Cheers,
--Chris
-
- Posts: 5786
- Joined: Sun Mar 09, 2008 2:17 am
- Location: Reading, Berkshire, England