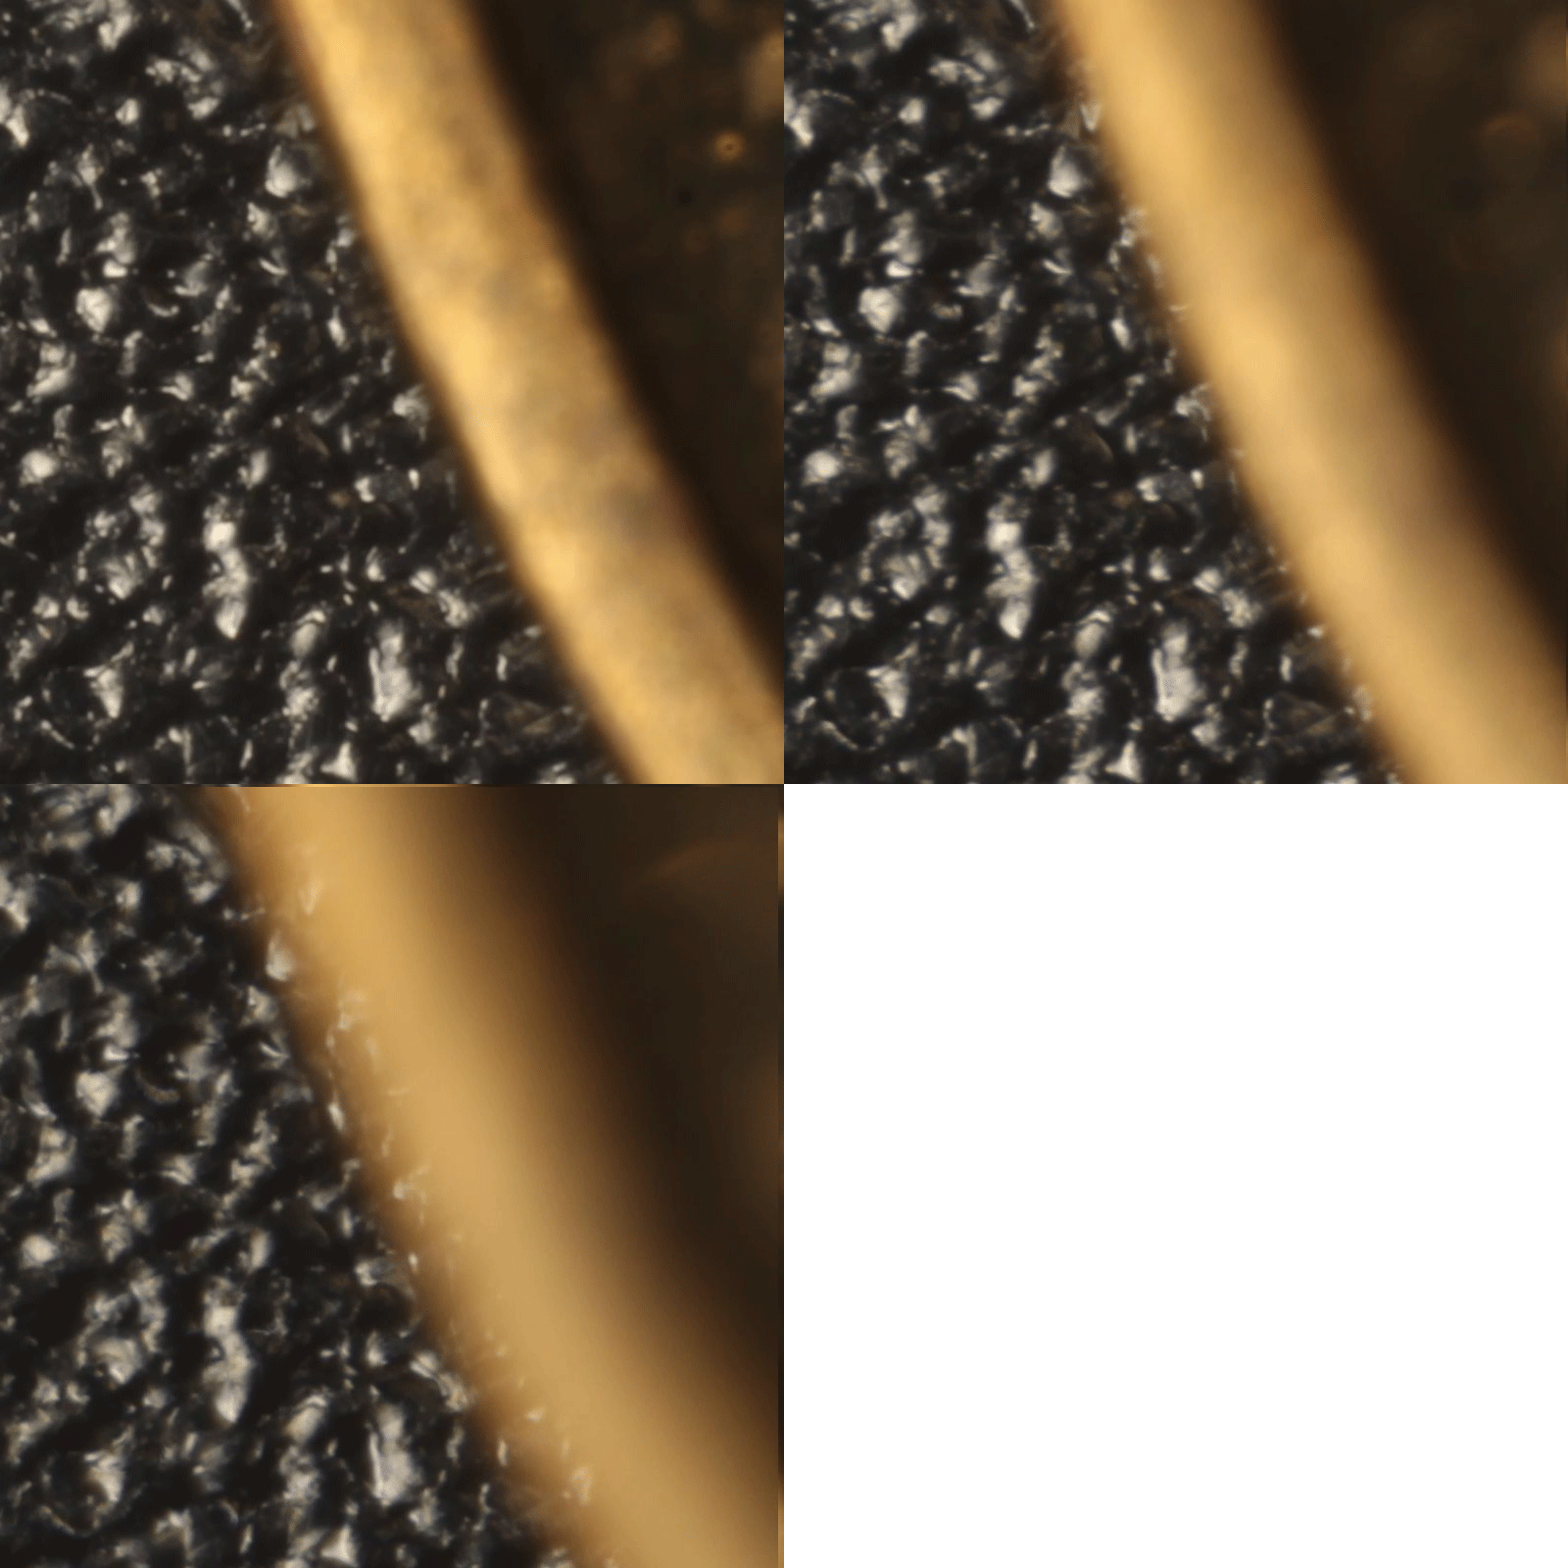
Reduced NA gives more detail

A forum to ask questions, post setups, and generally discuss anything having to do with photomacrography and photomicroscopy.

Moderators: rjlittlefield, ChrisR, Chris S., Pau

ray_parkhurst
Posts: 3439
Joined: Sat Nov 20, 2010 10:40 am
Location: Santa Clara, CA, USA
Contact:

Post by ray_parkhurst »

Chris S. wrote:Ray, though I’m sure you understand diffraction
I'm still learning! My expertise is in MW/RF, not Optics, and although wave physics is common between them my specialty is NOT antennas...

One thing that has always bothered me about diffraction, and that I have settled on a practical solution for in my coin photography, is what happens going the "other" direction, ie having a wider-than-needed aperture. While it is true that as the aperture widens, smaller and smaller features can be resolved, assuming aberrations are not limiting. But resolution of small features is not necessarily a good thing for digital sensors given the non-co-location of the tri-color Bayer arrays. My preferred solution (probably that of many others as well) is to limit my max aperture to the Rayleigh limit, which calculates out to the DLA of the sensor array. This puts as uniform a main lobe in the Airy Disk as possible, spread across each pixel, and the first null at the center of the next pixel. Having a shallower DOF is a disadvantage for coins, and it comes with the potential that the first nulls in the Airy Disks may fall on the Red or Blue sensors, causing color issues. So I adjust my aperture such that it is at or slightly smaller than the DLA of the sensor, and this gives me that warm fuzzy feeling of uniformly-covering each pixel while preserving sharpness and DOF.

Of course folks working at higher magnifications don't have this luxury, and must push the limits of their optics. For Dollars at M=0.35 the limit is f/5 on my T2i, so quite a number of lenses are capable of giving superb performance. But for Cents at M=0.7, the limit is around f/4 so we're back to using most lenses (except the 105 Printing Nikkor) wide open. Ultimately it was the use of the 105PN for Cents that made me explore this question, and I've found that running at f/4 for Cents gives a sharper and more color-correct image than f/3.3 or f/2.8, with better DOF.

The question still holds though for portrait and landscape photographers...does the shallow DOF of wide-aperture lenses cause chromatic aberrations? Is elimination of this effect, regardless of aperture, a byproduct of the AA filter that has kept manufacturers using them for so long?

ChrisR
Site Admin
Posts: 8671
Joined: Sat Mar 14, 2009 3:58 am
Location: Near London, UK

Post by ChrisR »

I feel it would be better to put tangential subjects in different threads while there's still discussion on the original theme in this one.

It occurs to me that the subject of this thread, concerned as it is with something alongside the "Transparent foreground" problem and how to deal with it, would not be a subject familiar in the realm of coin photography. A corollary of the Transparent foreground, is the Veiled background!
the high-NA stack looks to have much lower resolution in areas that should not be affected by the ledge-contrast issue.
The lower-NA stack may seem sharper at first look but there's more detail in the higher NA one.
Contrast tends to go up a little when you stop down from full aperture.
>The subject is about visible detail not sharpness or resolution. <
USM was applied to bring out all the detail that's there, therefore set at a level higher than would normally be used, on purpose. A consequence is that small details become larger and more contrasty again, so more noticeable. I think that's what's been seen.

--

One extra alignment wrinkle I think I can see is that when the aperture is stopped down the focus shifts. Its position is in the commonly used 42mm device, with a separate M42 to Mitutoyo adapter in front.

I've just run a stack of a few hundred frames of a subject with a lot of overlapping structure, with their veiled backgrounds, so I'm thinking in terms of how to improve it.

Picking the aperture size appropriate to the desired output image size (eg for web use) is a first step, but that means there's no ultimate-resolution image for other uses.

In my fantasy world, I want to have about 4 stacks combined, each taken with a different aperture. Each tighter viewing cone would get closer to the structure "in front", to reduce the halo. The resolution would decrease, but short of removing all the structures in front physically, that's the best that could be done. The output could have the best achievable.

Given (a) a rigid immovable subject, and (b) a rig and (c)optics set-up not requiring any alignments (so the controls can be turned off) I think 4 stacks could be run and the outputs stacked, simple.

Many organic subjects move very slightly during a stack, but it doesn't show because physically-close elements move together. It would show much more if comparing consecutive stack results.
So for subjects which fail (a), adjusting aperture and illumination during the stack seems to be the only option. Manually, oh boy, it's a pain!
Automatic exposure (which I don't happen to have for flash) would help but we're left with the need to adjust an aperture. Even for a manual stacker (like me) it would be much easier if that could be done electrically. Not too difficult, but not off-the-shelf.

(b) Rig alignment, and wobbles, will vary between setups.
Focus rails often show lateral intermittencies or a helical movement.
I have to use flash for anything much over 1:1 - others do much better.

(c)Optics. For higher magnifications, (>=10x ?)many objectives turn out to be close to telecentric. Macro-lenses and their usual magnifications, I believe tend to need scale alignment during the stacks, though I haven't experimented much. Perspective may become odd, at least.

ChrisR
Site Admin
Posts: 8671
Joined: Sat Mar 14, 2009 3:58 am
Location: Near London, UK

Post by ChrisR »

Horstl wrote:Do you think that some kind of structured Epi-illumination could work?
I don't see why not, but that may be because I don't know enough about it. Every time I delve into some recent develpment in microscope technology, I'm just jealous and full of questions!
I believe there's an LCD sheet which can be programmed to behave like the confocal's pin hole(s) or spinning disc.

Imagine, if we could project an array of illumination onto the subject in response to what we could see inthe Live View image...
LiveView > photoshop screen/manipulations > image projector > subject. :smt110

conkar
Posts: 200
Joined: Sat Dec 18, 2010 2:22 am
Location: Sweden
Contact:

Post by conkar »

Chris, have you had any thoughts about the risk of adding CA when the na is reduced?

If I compare the Mitu 20x na 0.42 with the Mitu SL 20x na 0.28 I see what you talking about here, but my own concern is also the increasing amount of CA that comes when the na is reduced.

Regards,
Conny

ChrisR
Site Admin
Posts: 8671
Joined: Sat Mar 14, 2009 3:58 am
Location: Near London, UK

Post by ChrisR »

Um, no, I haven't!
Why should reducing the NA lead to CA?
I can see it happening due to the iris being in the "wrong" place, perhaps, but not as a result of swapping objectives.

It could mean hand-retouching rather than letting the stacker combine images.

ray_parkhurst
Posts: 3439
Joined: Sat Nov 20, 2010 10:40 am
Location: Santa Clara, CA, USA
Contact:

Post by ray_parkhurst »

ChrisR wrote:I feel it would be better to put tangential subjects in different threads while there's still discussion on the original theme in this one.

It occurs to me that the subject of this thread, concerned as it is with something alongside the "Transparent foreground" problem and how to deal with it, would not be a subject familiar in the realm of coin photography. A corollary of the Transparent foreground, is the Veiled background!
But I am still not convinced in your analysis, so I still feel discussion of diffraction affects is relevant. You're of course correct that there is no real analogous situation in coins, except that the effect of a blocking object has a fairly wide impact on the resolution that can go deep into the subject area.
ChrisR wrote:The lower-NA stack may seem sharper at first look but there's more detail in the higher NA one.
Contrast tends to go up a little when you stop down from full aperture.
>The subject is about visible detail not sharpness or resolution. <
If you look into the > on the high-NA image, you can just make out the details that are more clearly present in the low-NA one with about the same level of resolution (visibility) as you can in, for instance, the green blob. So it appears to me the details are not missing, just obscured by low contrast, but that this happens not just in the > but in other areas of the high-NA image.

So, I second Rik's request to show source images. It's possible the issues I'm seeing on downsized, levels-adjusted images are not real and the source images will clear things up.

ChrisR wrote:One extra alignment wrinkle I think I can see is that when the aperture is stopped down the focus shifts. Its position is in the commonly used 42mm device, with a separate M42 to Mitutoyo adapter in front.
That's never a good thing, and of course complicates any effort to order the images for stacking. I saw a scale difference between the images when doing the crops, but assumed some change in your workflow between the images. The focus shift is not THAT big, is it?

edited to add: I stated above that you can see the details in the right side of the > in the high-NA image, but in fact the ones all the way to the corner of the > are missing. And since diffraction on that edge would impact both images, I am (finally) coming across to your point of view. It would still be nice to see the source images, though...Ray

ChrisR
Site Admin
Posts: 8671
Joined: Sat Mar 14, 2009 3:58 am
Location: Near London, UK

Post by ChrisR »

You can see finer detail on the upper surface of the teeth though, yes? These images are neither down-sized nor levels adjusted. The sharpening applied revealed all that was there, Curves didn't do it.
.
just obscured by low contrast
Yes they are. Irretrievably! That's the problem.

Could you explain what diffraction effect enables seeing more at lower NA?


I'll prepare some frames when I have some more time.
(Different computer.)

ray_parkhurst
Posts: 3439
Joined: Sat Nov 20, 2010 10:40 am
Location: Santa Clara, CA, USA
Contact:

Post by ray_parkhurst »

ChrisR wrote:You can see finer detail on the upper surface of the teeth though, yes? These images are neither down-sized nor levels adjusted. The sharpening applied revealed all that was there, Curves didn't do it.
.
just obscured by low contrast
Yes they are. Irretrievably! That's the problem.

Could you explain what diffraction effect enables seeing more at lower NA?
Diffraction from the edges of the features is not NA-dependent.

Note that just after sending last post I took the two crops and adjusted contrast to see the details, and indeed the detail right on the corner of the > is gone. I'm getting closer to believing your analysis, though I want to do a similar experiment myself to validate it. Let's see what I can come up with within my realm...Ray

rjlittlefield
Site Admin
Posts: 23625
Joined: Tue Aug 01, 2006 8:34 am
Location: Richland, Washington State, USA
Contact:

Post by rjlittlefield »

ray_parkhurst wrote:Diffraction from the edges of the features is not NA-dependent.
I'm not sure how you're thinking about this.

I definitely agree that whatever effect the foreground features have on the light field in front of the lens will not depend on the NA of the lens.

However, I'm also quite confident that the way those features affect the final image, after the light has gone through the lens, will depend on NA.

Since we're concerned here with the effect on the final image, I don't know how to interpret your comment.

--Rik

ChrisR
Site Admin
Posts: 8671
Joined: Sat Mar 14, 2009 3:58 am
Location: Near London, UK

Post by ChrisR »

Diffraction from the edges of the features is not NA-dependent.
Well, it is in a way..
The half-cone radius would be larger for the higher NA so it would start to affect the relative resolution, further from the edge, and therefore could be more noticeable.
But it shouldn't be worse for a partially obstructed higher NA lens than it would be for an unobstructed lower NA lens in the same position.
As far as I can see. Unless there's a difference in post-exposure treatment to shift the levels on a sharpness scale and push the edge-affected areas down. There isn't, that I can think of. It's not the sharpening, things were not much changed by applying that. I can't see the stacker doing it either.

What diffraction effect enables seeing more at lower NA?

The green blob, by the way, is a spore, which even after some days since exposure to moisture, seems to have something like a wet membrane around it. Perhaps that's why it might look odd.
For species differentiation it can be necessary to dissect the spore and look inside :shock: .

ray_parkhurst
Posts: 3439
Joined: Sat Nov 20, 2010 10:40 am
Location: Santa Clara, CA, USA
Contact:

Post by ray_parkhurst »

My point is that the "diffraction field" created by the edge feature is what it is, independent of how you look at it or what NA the lens is. My concept is that for a high-NA lens, you include more of that field in each pixel's information, and thus have potential for the field to distort that information.

In an attempt to demonstrate the effect Chris has shown, I've taken a sequence of 3 shots (of a coin, of course). The coin is a Proof Cent, which in general have very sharp and vertical edges, such that the stage plate the Cent is sitting on is straight down the wall of the Cent's edge. First shot is the overall image, at approx 2:1, with a Printing Nikkor. This is an example shot at f/2.8. I also took the same shot at f/6.7, and at f/11 (max for the PN) and cropped an 800x800 image from the center of each. Here is the overall view, followed by the crops. Critical focus is on the surface of the stage plate:

Overall
Image

Center crop f/2.8
Image

Center crop f/6.7
Image

Center crop f/11
Image

I believe this is showing the same effect Chris shows and explains above.

As the aperture is widened, the edge of the coin becomes blurrier (due to reduced DOF) and appears to extend further due to a bigger portion of each light cone hitting the pixels being obscured by the edge of the coin, creating a sort of "double exposure" for those pixels.

The widest aperture shows the widest impact and the most obscuring of the detail near the edge of the coin.

The detail does not disappear, just gets reduced in proportion to the amount of OOF coin edge present in the light cone. A brighter, whiter edge would cause more contrast reduction, and this is what Chris' images contain.

Interestingly, in this example, details appear in the wide aperture image that are only partially there in the middle one and not there at all in the narrowest one. Even though the coin edge is perfectly vertical, and the lens is looking straight down on the edge of the coin, there is still some detail under the coin due to the roughness of the stage plate. The wider aperture is picking up a small amount of this information, essentially looking under the coin. At least that's my interpretation.

edited to add... this is at 2x. I tried this at 1x, but the blurriness was not enough to cause a dramatic enough demo since the DOF was still proportionally deep. I went to 2x to get shallow enough DOF to show the effect well.

rjlittlefield
Site Admin
Posts: 23625
Joined: Tue Aug 01, 2006 8:34 am
Location: Richland, Washington State, USA
Contact:

Post by rjlittlefield »

In an attempt to demonstrate the effect Chris has shown, I've taken a sequence of 3 shots (of a coin, of course).
...
As the aperture is widened, the edge of the coin becomes blurrier and appears to extend further. A bigger portion of each light cone hitting the pixels is now obscured by the edge of the coin, so we get a sort of "double exposure" for those pixels.

The widest aperture shows the widest impact and the most obscuring of the detail near the edge of the coin.

The detail does not disappear, just gets reduced in proportion to the amount of OOF coin edge present in the light cone. A brighter, whiter edge would cause more contrast reduction, and this is what Chris' images contain.
I like the experiment, and I agree with this interpretation.
Interestingly, in this example, details appear in the wide aperture image that are only partially there in the middle one and not there at all in the narrowest one. Even though the coin edge is perfectly vertical, and the lens is looking straight down on the edge of the coin, there is still some detail under the coin due to the roughness of the stage plate. The wider aperture is picking up a small amount of this information, essentially looking under the coin. At least that's my interpretation.
Another possibility came to mind that maybe we're seeing stage plate details that are outside the coin, being reflected from the shiny sides of the coin.

To help think about this, I took Ray's three crops, aligned them by stage plate texture, and assembled them into a three-frame animated GIF. Here's what that looks like:

Image

But in the animation, I actually don't see much stage plate detail appearing inside the area of the coin that is suggested by the narrow-aperture image. I do see new bright spots appearing outside that area, and now I'm thinking those bright spots are actually double-reflections of the illumination, first off the edge of the coin onto the stage plate and then off the stage plate into the wider aperture of the lens.

I can't tell for sure, though. I'm thinking it might take real-time exploration with a cat's whisker probe or some such to tell exactly what's going on here.

--Rik

ray_parkhurst
Posts: 3439
Joined: Sat Nov 20, 2010 10:40 am
Location: Santa Clara, CA, USA
Contact:

Post by ray_parkhurst »

rjlittlefield wrote: Another possibility came to mind that maybe we're seeing stage plate details that are outside the coin, being reflected from the shiny sides of the coin.

To help think about this, I took Ray's three crops, aligned them by stage plate texture, and assembled them into a three-frame animated GIF. Here's what that looks like:

Image

But in the animation, I actually don't see much stage plate detail appearing inside the area of the coin that is suggested by the narrow-aperture image. I do see new bright spots appearing outside that area, and now I'm thinking those bright spots are actually double-reflections of the illumination, first off the edge of the coin onto the stage plate and then off the stage plate into the wider aperture of the lens.

I can't tell for sure, though. I'm thinking it might take real-time exploration with a cat's whisker probe or some such to tell exactly what's going on here.

--Rik
Nice animation! I considered a reflection off the coin edge as the cause, but I would expect some sort of "mirror image" effect in that case. There is one highlight that does sort of look that way, but the others don't have a corresponding highlight.

I had not considered a re-reflection, and indeed that may be the case. One issue with this is the color of the "new" highlights are white, while I would expect light reflecting off the coin to have a copper color. I'd also expect any direct reflected highlights to be copper colored.

Part of the reason for my original hypothesis was that even some of the existing highlights nearest the edge get a bit brighter going from f11 to f6.7 before they are partially obscured at f2.8. The slightly wider light cone at f6.7 captures more light from those highlights. Going from f6.7 to f2.8 the highlights get no brighter. But again, just a hypothesis...Ray

soldevilla
Posts: 684
Joined: Thu Dec 16, 2010 2:49 pm
Location: Barcelona, more or less

Post by soldevilla »

I am very interested in this thread. I have done a test this morning with my new Nikon x10. I have built a fixed aperture with a diameter half of its front lens, and I've done a stack of the same sample, with and without diaphragm.

The images that I show are crops at 100%, without any treatment, as Zerene delivery.

The difference is not very large, the diameter of the bright spots is slightly larger in the diaphragmed test, and areas out of focus at the edges of elements at different heights are better at objective diaphragmed.

For the rest, I expect a significant reduction in that ugly bluish CA, but I see almost no reduction. In this theme ... Are we sure that all objectives we possess with NIKON logo have been manufactured by NIKON or they may be a fake copy made &#8203;&#8203;God knows where? On one hand I am surprised how much CA Blue has this objective (much more than my Korean x10 not LWD) and I was surprised also that the NIKON brand on the lens barrel falls off with the tape I used to secure the diaphragm position.

With diafragm
Image

And without
Image

ChrisR
Site Admin
Posts: 8671
Joined: Sat Mar 14, 2009 3:58 am
Location: Near London, UK

Post by ChrisR »

In an attempt to demonstrate the effect
It (getting more detail with a smaller aperture) is actually very easy to demonstrate, for normal, three-dimensional subjects with some overlaps.
It's particularly noticeable where the detail is more surrounded by laterally closer structures, at different depth, which cause out of focus blurs. In the first subject it was the tight "V" shape.
The detail does not disappear, just gets reduced in proportion to the amount of OOF coin edge present in the light cone. A brighter, whiter edge would cause more contrast reduction, and this is what Chris' images contain.
Fine, so glad the penny has dropped! Edges causing softening by reducing the visible cone and therefore NA, seems to be way less significant, in the opposite direction, and a different subject.

But the detail does disappear, as shown in the first post.
It seems to me to go something along the lines of the following:
Whether things show up depends on their ultimate contrast, which depends partly on how well they're resolved, and how bright the veiling blur, is.
Say the dark part of the detail is one stop darker than its bright part:
one unit of light versus two units of light.
You would think it would show up easily? It's twice as bright!!
But if the blur is 4 stops brighter, then add 32 units of light (2 * 2^4=32)
which in combination gives 34 units of light versus 33. That's a 3% difference in the light level – maybe enough to get lost in noise? Even if not, the low contrast is way down the MTF curve for the lens, so the resolution’s gone.
So you don't see the detail any more. It is not in appearance, it is disappeared, it has gone to meet its maker, it is a dead pixel..
I've plucked the numbers from thin air, but that sort of thing seems inevitable.

--

The effect of a better picture with reduced NA is annoyingly commonplace, I think.
Here's a very common-or-garden shot, the same subject, a different part, at 10x NA 0.25.
Full frame, in the area circled, the leaf underneath looks horrible to me, because the blur from the closer leaf has veiled it, so the detail is disappearing.
Image

The actual-pixels crop shows that all the detail generally, is not visible in the full frame presentation because it's too small.
Image
So I would have been BETTER to have reduced the aperture of the objective, for a web picture 1000 pixels wide, because the detail generally wouldn't look any different, but the "horrible" area would be smaller and less noticeable.

This is a case where I cannot rerun the stack, because the subject is highly sensitive to moisture so its leaves move all the time.

Running the numbers for the resolution required, to produce a couple of pixels per image detail, at 10x, to show on an image at 1000 pixels wide, I get that NA 0.1 would be enough.

[Edit - I may have not retouched the higher leaf at the crossover - different computer now and it doesn't make any difference.]
(And yeah, Nikon CFN objectives’ paint always comes off on sticky tape :( )

Post Reply Previous topicNext topic