Trinocular, cheap microscope

Images made through a microscope. All subject types.

Moderators: rjlittlefield, ChrisR, Chris S., Pau

phreakocious
Posts: 32
Joined: Tue Mar 08, 2011 1:27 pm
Contact:

Trinocular, cheap microscope

Post by phreakocious »

This picture of a rather tiny brass screw is the product of:
cheap scope trinocular port-> c-mount adapter-> 2.5x eyepiece inside extension tube-> T2/F-mount->Nikon D7000

Image
http://tinyurl.com/6e8kv8t/ (flickr)

This was the best image of many attempts. I am slightly mystified as to where all of the color fringing/CA is coming from? Is it based on the distance to the subject, or some other obscure nuance of optics?

Cheers!
Last edited by phreakocious on Wed Mar 09, 2011 9:12 am, edited 1 time in total.

rjlittlefield
Site Admin
Posts: 23608
Joined: Tue Aug 01, 2006 8:34 am
Location: Richland, Washington State, USA
Contact:

Post by rjlittlefield »

Help me out, please -- where is the CA that you're referring to?

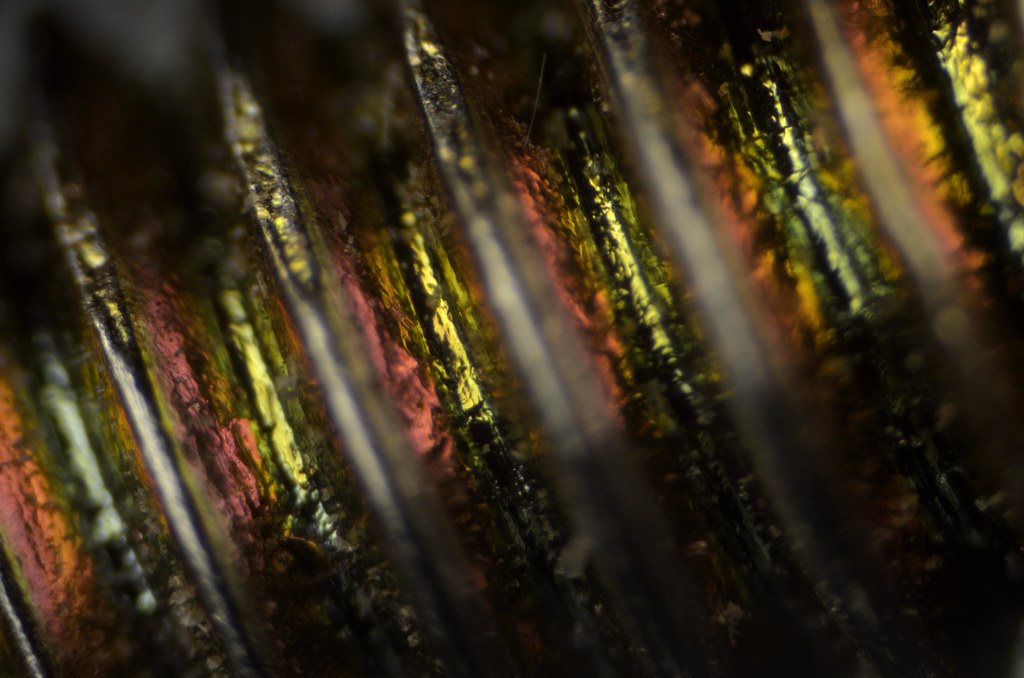
There are two kinds of CA often encountered in shooting through microscopes. One of them is lateral (transverse) CA, where you get typically red/blue color fringes in the radial direction on both out-of-focus and in-focus features. The other is longitudinal CA, where you get typically green or magenta outlines around only the out-of-focus features.

Before I went to visit your page at Flickr, I expected to see bad red/blue color fringes. Those would have been especially obvious on the almost in focus light gray features at lower left, and I'm not seeing them. There may or may not be some longitudinal CA, which in this image I would have trouble separating from real color of the subject. The colors that I do see (red, green, yellow in broad bands generally aligned with the threads) look like natural colors due to the metal oxide films.

I'm not sure if you're seeing something that I've overlooked, or if we're putting different interpretations on the same things.

This image actually looks pretty good to me. If you want an unambiguous indication of CA, try something printed in black ink, preferably done by copier or laser printer that will have tiny crisp dots of toner, as opposed to liquid ink that will bleed. See HERE for an example.

--Rik

phreakocious
Posts: 32
Joined: Tue Mar 08, 2011 1:27 pm
Contact:

Post by phreakocious »

Rik,

Awesomely detailed explanation, thanks. It was the red/green/yellow coloration that confused me. I didn't notice it when looking through the eyepiece, but perhaps that's due to being in motion, akin to photographing oil on water?

More trinocular experiments are in order!

rjlittlefield
Site Admin
Posts: 23608
Joined: Tue Aug 01, 2006 8:34 am
Location: Richland, Washington State, USA
Contact:

Post by rjlittlefield »

It is very interesting that you did not notice these colors when looking through the eyepiece. My curiosity is always tickled when I hear of differences like this.

With the optics that you describe, I cannot think of anything that would cause a camera to see highly saturated colors that the eye does not. This presumes that the eye and camera are actually looking at the same image, which makes me wonder if the lighting is different for the photograph. Sometimes colors depend a lot on angle of the light, as in your example of oil on water. When this happens, it is a good indication that the color is due to a thin-film interference effect, exactly like the oil.

What was the lighting for this shot? Was it the same for eye and camera?

By the way, I notice that your image is hosted at Flickr and you have posted here only a link to it using the url tag. We generally prefer images to be shown inline using the img tag. I believe there is some way (but I don't know what it is) to get Flickr to give you a direct address for the picture -- something that ends in .jpg . That address, wrapped in img tags, will make your picture appear inline here. Alternatively, you can upload the image to our own server at photomacrography.net, using the technique described HERE. If you choose the latter approach, be sure to read carefully the instructions at step 5. The forum's user interface is a bit obscure in that area.

--Rik

phreakocious
Posts: 32
Joined: Tue Mar 08, 2011 1:27 pm
Contact:

Post by phreakocious »

Edited the original post to in-line the image.

The lighting was not sophisticated and was the same for both:

Image


The image was corrected for color temperature against a sample gray image and there would have been an interesting angle on the lighting for sure. I may try to reproduce this tonight.

Thanks again for the insights!

phreakocious
Posts: 32
Joined: Tue Mar 08, 2011 1:27 pm
Contact:

Post by phreakocious »

Tried to reproduce my color situation, but I can't find that darn screw. :(

Here's a few other pictures, though:

I made a diagram of concentric circles in Visio to help align a binocular tube. This was printed at "1200 dpi" on an HP laser printer with all of the economy options disabled and all of the quality options maxed out. It looks a lot better from a distance. ;)

Image


And this is just a piece of copper wire:

Image

Cheers!

rjlittlefield
Site Admin
Posts: 23608
Joined: Tue Aug 01, 2006 8:34 am
Location: Richland, Washington State, USA
Contact:

Post by rjlittlefield »

The paper target shows no significant CA. It's remarkably clean. The loss of focus on the corners is probably due mostly to curvature of field, which will be of no concern if you stack.

The copper wire is typical of a metal subject illuminated by harsh light. To get a good looking surface at high magnification, you're going to need very diffuse illumination. Wrap some tissue paper around the specimen, if nothing else.

--Rik

phreakocious
Posts: 32
Joined: Tue Mar 08, 2011 1:27 pm
Contact:

Post by phreakocious »

Thanks for the info, Rik. It would be awesome if there were a collection of diagnostic tools and information one could reference to help determine if their setup is behaving properly. Test patterns and how to interpret results, etc. Are you aware of any good books or online reading material on the subject?

rjlittlefield
Site Admin
Posts: 23608
Joined: Tue Aug 01, 2006 8:34 am
Location: Richland, Washington State, USA
Contact:

Post by rjlittlefield »

phreakocious wrote:Are you aware of any good books or online reading material on the subject?
I don't know any place that is both reasonably complete and reasonably concise. Questions like yours certainly come up periodically: "I shot this picture. I'm not happy with how it came out and I want to know, what went wrong and how can I get better results?" Unfortunately those are usually not easy to answer. Even with interaction, it often takes us several iterations to get down to a good answer. Your situation is unusual in that it seems your scope and camera are already playing pretty well together. The hard ones are where the corners are both blurred and color-fringed, and all of us start off by wondering why that is.

--Rik

Post Reply Previous topicNext topic