Lacrymaria. Old pictures "redone"

Images made through a microscope. All subject types.

Moderators: rjlittlefield, ChrisR, Chris S., Pau

Charles Krebs
Posts: 5865
Joined: Tue Aug 01, 2006 8:02 pm
Location: Issaquah, WA USA
Contact:

Lacrymaria. Old pictures "redone"

Post by Charles Krebs »

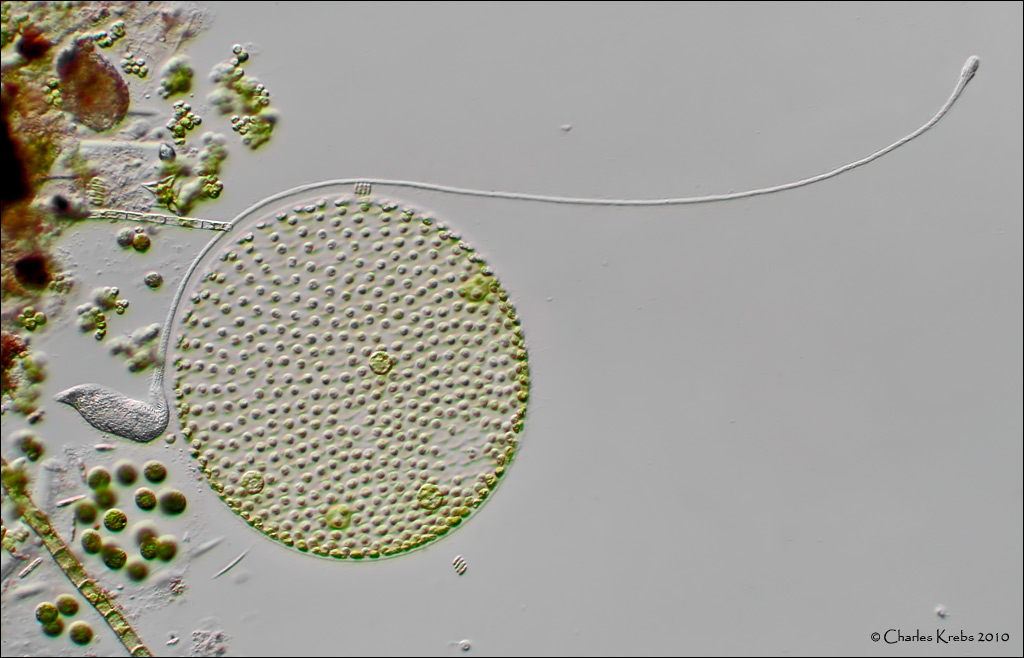
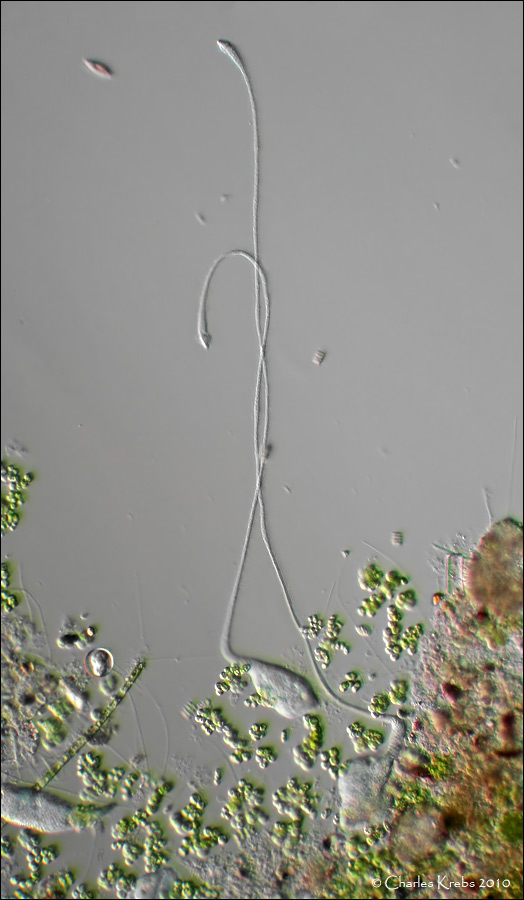
I posted a Lacrymaria shot the other day, and had linked to some old shots to show the amazing neck extension possible. The older shots were poorly prepared, and the old 640 pixel-wide limit really couldn't portray this feature that well. But these old shots recorded the extension so well I decided to revisit a couple of the original pictures and post updated and larger versions. The lighting on these was oblique brightfield.


Image

Image

gpmatthews
Posts: 1040
Joined: Thu Aug 03, 2006 10:54 am
Location: Horsham, W. Sussex, UK
Contact:

Post by gpmatthews »

Charlie - getting such long features all in one plane is quite a triumph, even using only a thin film of water - but the Volvox doesn't look particularly squashed...
Graham

Though we lean upon the same balustrade, the colours of the mountain are different.

Mitch640
Posts: 2137
Joined: Sun Aug 15, 2010 1:43 pm

Post by Mitch640 »

I ran across these shots when I first joined the forum, then again the other day. I can see the new processing done to them. It's a good thing to keep the old files. We always get better at processing and who knows what software is going to come along in the future? But that is still an amazing stretch. :)

Can you describe how you did the oblique brightfield?

Ecki
Posts: 775
Joined: Wed Aug 13, 2008 2:04 am
Location: Cape Town, South Africa
Contact:

Post by Ecki »

Charles,

very nice pictures of Lacrymaria olor. The ones that I had under a coverslip did not show their flexible neck as nicely as yours. I find them in duckweed. They are nice to watch in a petri dish where they can bee seen hunting.

Regards
Ecki

Charles Krebs
Posts: 5865
Joined: Tue Aug 01, 2006 8:02 pm
Location: Issaquah, WA USA
Contact:

Post by Charles Krebs »

Mitch,
Can you describe how you did the oblique brightfield?
Don't remember which scope I took this with, but it was one of two ways...

One microscope used at that time had a "rotate out" filter holder at the base of the condenser. With this one I made up opaque paper disks that fit into the filter holder. These disks had apertures of various sizes and shapes (Usually off-center round holes or crescent shapes). If needed I moved these new "apertures" around by rotating the filter holder in/out slightly until I got the desired oblique effect.

The other microscope had a phase contrast condenser with rotating turret positions. I would use the normal brightfield position, but rotate the turret slightly (as if I were going to position a phase annuli) so that the aperture moved off center. This provides the oblique lighting. (This is not the same as de-centering the entire condenser itself... it is de-centering the condenser aperture only).

From the pictures you posted it does not appear that you have a filter holder under your condenser. But you could get some black opaque paper and cut some holes and tape it "off-center" to the bottom of the condenser. You would need to experiment with the hole size and position, but oblique brightfield can be very effective.

Look a "Figure 5" on this page:
http://www.olympusmicro.com/primer/tech ... intro.html

Also look under the "Types of Illumination" page on this link:
http://www.mbstevens.com/mscope/index.html#top

(BTW... this last link has a lot of good, easy to understand info in the various sections. It can explain great deal, and inspire you to try various techniques).
Mitch640
Posts: 2137
Joined: Sun Aug 15, 2010 1:43 pm

Post by Mitch640 »

I have tried the paper cutouts and they do work fairly well. I even bought a circle cutter and cut out some exact sized ones for my light output on the base. They didn't work as well, so I think I need smaller holes. I even cut some colored ones for Rheinberg Illumination, from some gel filter I had laying around. Great links there too, I have some reading to do.

And no, no flip out filter holder under the condenser. My other scope has one, but it won't adapt to the fluophot.

Charles Krebs
Posts: 5865
Joined: Tue Aug 01, 2006 8:02 pm
Location: Issaquah, WA USA
Contact:

Post by Charles Krebs »

and cut out some exact sized ones for my light output on the base.
It's best to position these as close to the condenser diaphragm as possible. That would be taped directly to the bottom of your condenser.

Mitch640
Posts: 2137
Joined: Sun Aug 15, 2010 1:43 pm

Post by Mitch640 »

Perfect, thanks Charles. I have been wondering about that. I was putting them down on the ring of the light, at the base. :)

Post Reply Previous topicNext topic