3D models of bytterfly scales

Images made through a microscope. All subject types.

Moderators: rjlittlefield, ChrisR, Chris S., Pau

JH
Posts: 1307
Joined: Sat Mar 09, 2013 9:46 am
Location: Vallentuna, Stockholm, Sweden
Contact:

3D models of bytterfly scales

Post by JH »

Made two 3D models of bytterfly scales. For the first one - common blue - I used a Nikon M plan 50x NA 0.9. I have posted a picture from this stack here: http://www.photomacrography.net/forum/v ... 399#181399

For the second picture I used the "soft" Beck reflecting objective 36x, some more pictures from that lens here; http://www.photomacrography.net/forum/v ... 076#179076


Image

Image


Best regards Jörgen Hellberg
Jörgen Hellberg, my webbsite www.hellberg.photo

Lou Jost
Posts: 5987
Joined: Fri Sep 04, 2015 7:03 am
Location: Ecuador
Contact:

Post by Lou Jost »

How amazing! Even the ridges are properly rendered in 3-d!

rjlittlefield
Site Admin
Posts: 23606
Joined: Tue Aug 01, 2006 8:34 am
Location: Richland, Washington State, USA
Contact:

Post by rjlittlefield »

Very nicely done!

Lou, which ridges are you talking about? When I lay the structures flat so that I can see the scales in profile, what I see is that all the fine striations have disappeared, leaving only much larger ripples at the level of several cycles per scale.

Here are a couple of examples. Look at the horizons, at top of image.

Image

Image

--Rik

Lou Jost
Posts: 5987
Joined: Fri Sep 04, 2015 7:03 am
Location: Ecuador
Contact:

Post by Lou Jost »

It seems to me that the lighter ridges on the brown scale which we are viewing from the tip in your upper photo are raised over the dark valleys. And when scales are viewed almost from the side, in profile, the color turns all light, indicating that the ridges are blocking the valleys.

rjlittlefield
Site Admin
Posts: 23606
Joined: Tue Aug 01, 2006 8:34 am
Location: Richland, Washington State, USA
Contact:

Post by rjlittlefield »

Hhmm... I am skeptical, but these depth maps may be better than any that I have looked at before.

Jörgen, any chance of getting models made with these very same depth maps but uniform color, preferably with light coming from the side so as to highlight whatever 3D striations there are in the depth maps?

--Rik

JH
Posts: 1307
Joined: Sat Mar 09, 2013 9:46 am
Location: Vallentuna, Stockholm, Sweden
Contact:

Post by JH »

Hi
Thanks for the interest in the 3D models.

I removed sensor dust before stacking. I do not think that this creates so much problems.

Before I made the 3D models I retouched the depth map. I did this to take care of some depth map stacking artefacts (dents and spikes). I used the Spot healing brush and Gausian blur in Adobe PS.

This is what the the common blue depth map looked like before retouching.
Image

Some of the non artefact fine structures are probably real and some are probably due to noise.

Best regards Jörgen Hellberg
Jörgen Hellberg, my webbsite www.hellberg.photo

Lou Jost
Posts: 5987
Joined: Fri Sep 04, 2015 7:03 am
Location: Ecuador
Contact:

Post by Lou Jost »

Rik, look at the upper right scale on the depth map Jorgen just provided. There are clear ridges under the noise. Same on many of the scales, though some are more obscured by noise than others.

JH
Posts: 1307
Joined: Sat Mar 09, 2013 9:46 am
Location: Vallentuna, Stockholm, Sweden
Contact:

Post by JH »

Hi
I agree that the “stripes” on the tip of the upper right scale probably reflects the real structures. In the model that I first posted the Gausian blur made almost al fine structures disappear – so Rik was correct being sceptical. :D
Jörgen Hellberg, my webbsite www.hellberg.photo

JH
Posts: 1307
Joined: Sat Mar 09, 2013 9:46 am
Location: Vallentuna, Stockholm, Sweden
Contact:

Post by JH »

One more thing.
As I have described it here http://www.photomacrography.net/forum/v ... 169#210169
the x-y-z scaling is done by hand, so the Z axis could be over or under estimated.
Jörgen Hellberg, my webbsite www.hellberg.photo

rjlittlefield
Site Admin
Posts: 23606
Joined: Tue Aug 01, 2006 8:34 am
Location: Richland, Washington State, USA
Contact:

Post by rjlittlefield »

Jörgen, thank you for the detailed explanation.

As I see this issue, the map is either clean but has lost detail, or shows some detail but is corrupted by noise. The combination of clean AND detailed is yet to be achieved by automatic processing.

For completeness, can we see the depth map after retouching, exactly as it was used to make the first image that Lou was responding to?

--Rik

Jacek
Posts: 5357
Joined: Sun Oct 02, 2011 7:00 am
Location: Poland

Post by Jacek »

Good job

Lou Jost
Posts: 5987
Joined: Fri Sep 04, 2015 7:03 am
Location: Ecuador
Contact:

Post by Lou Jost »

I think a sensitive test is to view the brown scales almost in profile, from the side, and look at the brightness. In this case, the brightness was the same as the brightness of the ridges, instead of the average brightness of the ridges and valleys, as it would have been if the ridge texture was absent. In fact as the scale is turned, the valleys can be seen to disappear as they are blocked by the ridges.

JH
Posts: 1307
Joined: Sat Mar 09, 2013 9:46 am
Location: Vallentuna, Stockholm, Sweden
Contact:

Post by JH »

rjlittlefield wrote:Jörgen, thank you for the detailed explanation.

As I see this issue, the map is either clean but has lost detail, or shows some detail but is corrupted by noise. The combination of clean AND detailed is yet to be achieved by automatic processing.

For completeness, can we see the depth map after retouching, exactly as it was used to make the first image that Lou was responding to?

--Rik
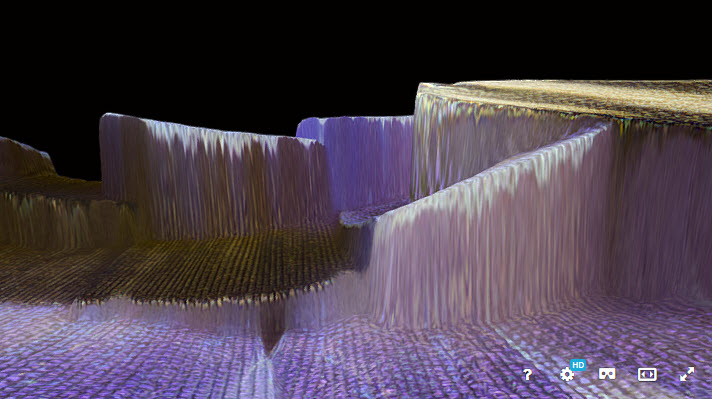
I uploaded the same model once more and deleted the texture. So this is the retouched depth map.

Image

With a more careful retouching of the depth map some of the “stripes” would have remained. Even better might be to do some of the retouching in 3D where it can be easier than in the depth map to see what is artefacts and what is supposed to be there.

--Jörgen
Jörgen Hellberg, my webbsite www.hellberg.photo

JH
Posts: 1307
Joined: Sat Mar 09, 2013 9:46 am
Location: Vallentuna, Stockholm, Sweden
Contact:

Post by JH »

Jacek wrote:Good job
Thanks :D
Jörgen Hellberg, my webbsite www.hellberg.photo

Lou Jost
Posts: 5987
Joined: Fri Sep 04, 2015 7:03 am
Location: Ecuador
Contact:

Post by Lou Jost »

I'm confused. Are you saying that this model is the one used to make the view at the beginning of the post? As I said, you can see the valleys disappear as you rotate the image in your first post, so I don't see how it could be the same as this flat model you have just posted. You can see much more texture also in Rik's screenshots than in this new retouched model.

Post Reply Previous topicNext topic