Sometimes you can improve an image by selectively sharpening just those portions of the image that you wish were sharper but aren't.
Here's an example.
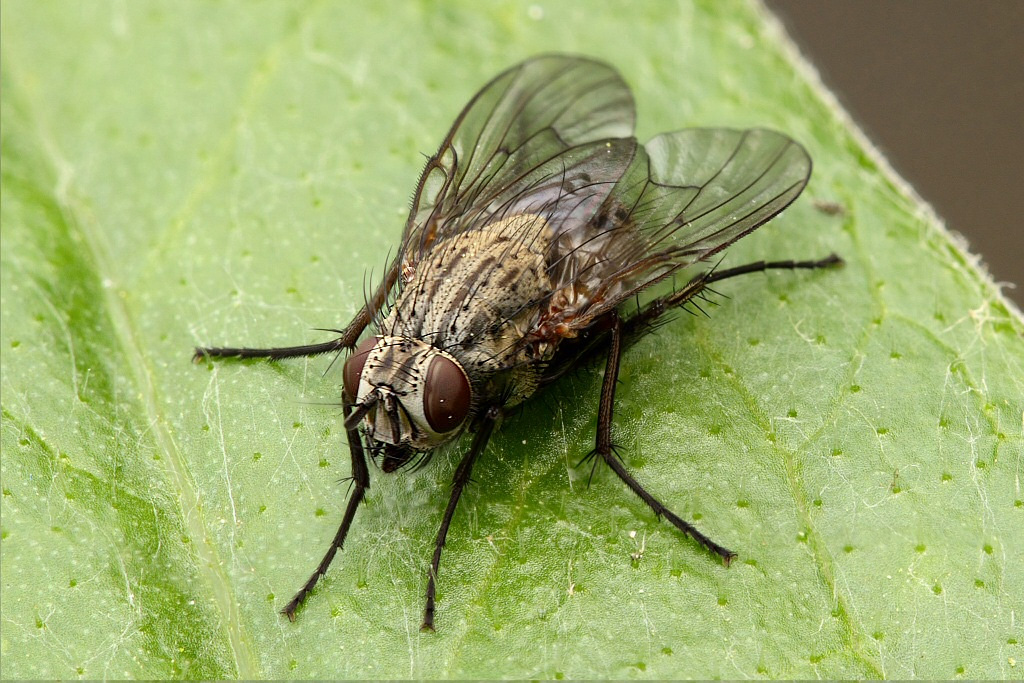
First, let's look at the original image. This happens to be a short stack (3 frames). In an ideal world, the face of the fly would be at least as sharp as that nice section at the back of the thorax between the wings. But it isn't. The face is soft. We don't know why it's soft -- perhaps there's some issue with motion blur or maybe just missing focus -- but we'd like to do the best we can to improve it.
Here it is, the original image:
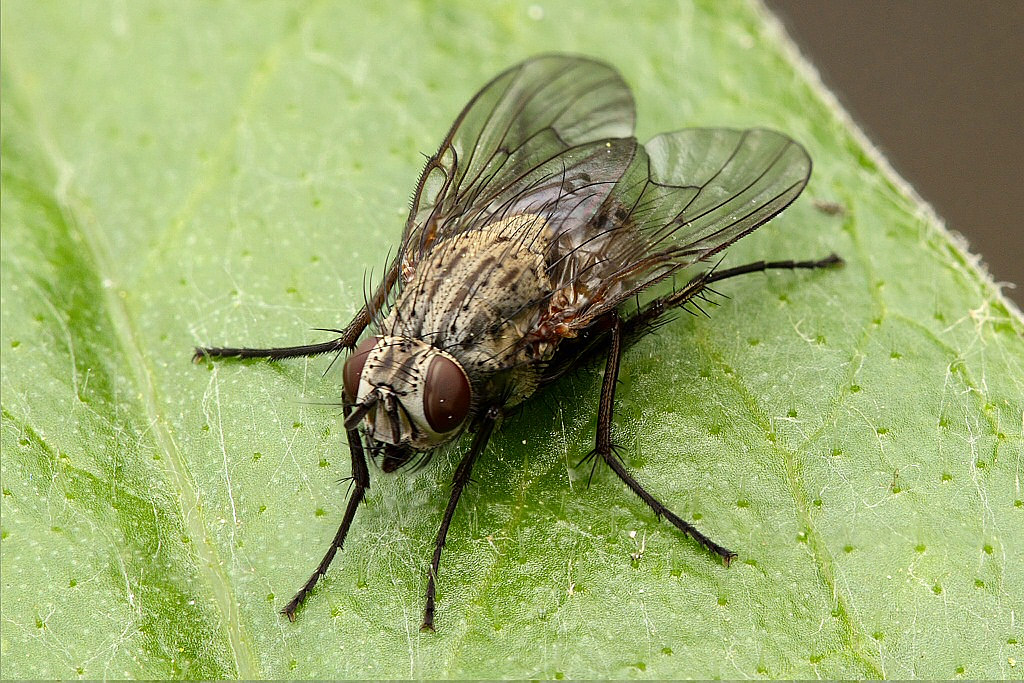
Now, jumping clear to the end, here's what we finally end up with:
At first glance, there's not a huge difference between those two images. That's OK, there's not supposed to be.
But here's a closer look at just the fly and its immediate surroundings:
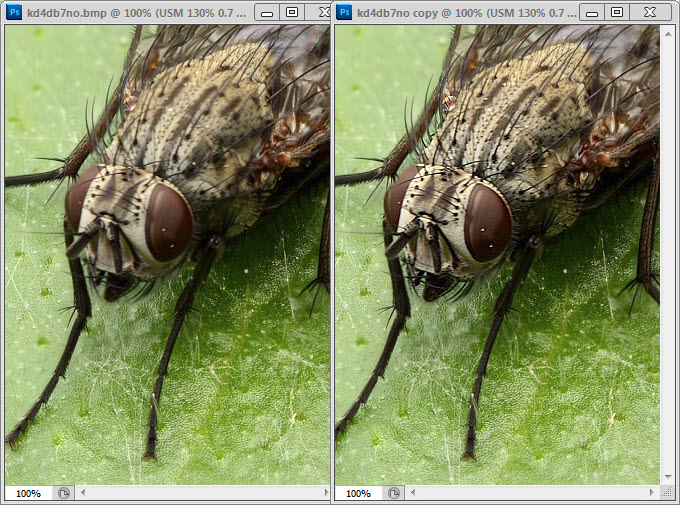
If that side-by-side comparison doesn't illustrate the difference, then consider this flashing comparison. (It's animated GIF at 2 seconds per frame. If the animation is working right, then in the lower right corner you'll see a flashing "Sharper" watermark.)
How was the sharpening done?
Quite strongly! What's shown above is sharpened using a Photoshop Unsharp Mask (USM) at 130% with a radius of 0.7 pixels.
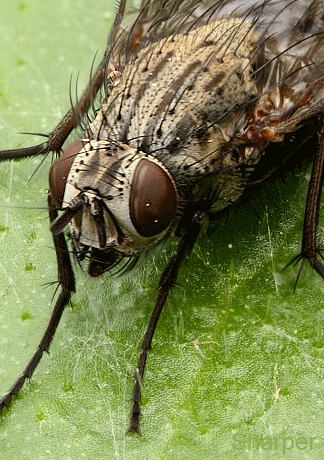
If that amount of sharpening is applied to the whole image, then areas that were already sharp get obviously oversharpened:
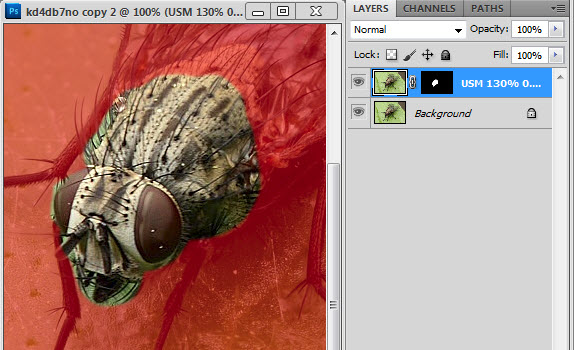
To keep this from happening, we can use layers and masking to apply the sharpening only to areas where it's not excessive and that we care about. Here is the layer and mask structure that I used. The mask itself is shown here using Photoshop's "rubylith" format, which can be reached by alt-shift-click on the mask icon or by simply hitting the backslash key "\". To generate the mask, I used Layer > Layer Mask > Hide All, then painted "white" on the mask using an appropriately sized brush with a slightly soft edge.
Many thanks to Martin for letting me use his Helina fly in this demonstration. Similar techniques can also be used to "push back" areas that are already soft but you'd like softer. See "Sharper subject, blurrier background" for discussion.
I hope this helps!
--Rik
Selectively sharpening out-of-focus areas of a subject
Moderators: rjlittlefield, ChrisR, Chris S., Pau
- rjlittlefield
- Site Admin
- Posts: 23605
- Joined: Tue Aug 01, 2006 8:34 am
- Location: Richland, Washington State, USA
- Contact:
-
- Posts: 145
- Joined: Sat Feb 09, 2013 4:54 am
- Location: Ipswich, Suffolk, UK
Thanks for the very helpful tutorial, with very helpful illustrations.
-------------------------------------------
Would there be any significant/substantial differences between this technique and a technique that simply uses something like the polygon select tool in Photoshop to choose the targeted area? The regions of the photograph outside the selected area would be unaffected by applying sharpening methods of your choice, and the borders of the selected region can be feathered if needed.
There are of course many advantages to using layers but for simple tasks I sometimes find it easier to simply select a region and then modify it as needed. This technique works for anything that Photoshop or plugins can do, of course, including things like exposure adjustments, etc, etc.
-Phil
"Diffraction never sleeps"
- rjlittlefield
- Site Admin
- Posts: 23605
- Joined: Tue Aug 01, 2006 8:34 am
- Location: Richland, Washington State, USA
- Contact:
Assuming you can have the proper area selected and feathered when you do the operation, then the end result will be the same.Would there be any significant/substantial differences between this technique and a technique that simply uses something like the polygon select tool in Photoshop to choose the targeted area?
I'm never good enough to do that, so I use the layers approach to let me play around with the mask while I'm continuously judging the overall result.
In preparing this example, there were several small areas that I originally thought would not need sharpening but looked better when I did, and conversely several other areas that I thought would need sharpening but looked better when I didn't.
It was quick and easy to adjust by tweaking the mask, but I think would have been quite difficult by repeated undo/reselect/operate.
--Rik
-
- Posts: 318
- Joined: Thu Sep 22, 2011 9:55 am
- Location: Florida
The out of focus band improves quite a bit. I think the dark edges in the eyes have a little bit of that over sharpened appearance though. I wonder how effective it would be to selectively sharpen only highlights, and selectively sharpen only dark edges. Either by making two separate layers to paint from using either smart sharpen, or using high pass filters clipped to a high and low range. And most importantly, if the difference justifies having to paint out two mask(each more carefully).
On another note I have often found selective sharpening very useful in helping avoid higher noise in backgrounds. Often times even perfectly fine photos are helped by selective sharping to avoid amplifying easy to spot ISO noise. It has also been useful for using high radius values when sharpening. Since those tend to produce halos in some regions, it is good to sharpen only the object up to the edges to avoid the sharpening halos.