JML 21mm f/3.5 Lens---Mounting Techniques

Have questions about the equipment used for macro- or micro- photography? Post those questions in this forum.

Moderators: rjlittlefield, ChrisR, Chris S., Pau

Sally
Posts: 10
Joined: Sat May 29, 2010 6:12 am
Location: Preston Lancashire England
Contact:

Post by Sally »

Here's my method of mounting - after trying various methods with tape, holes and blu tac, I got my other half to turn a BD thread on it:

Image

The mounting method works great, but I find contrast is still quite low - I assume I've got some stray light bouncing around somewhere.

Craig Gerard
Posts: 2877
Joined: Sat May 01, 2010 1:51 am
Location: Australia

Post by Craig Gerard »

Sally,

Good solution :)

How is it working out for you?

Are you still having problems with "stray light"?

Craig
To use a classic quote from 'Antz' - "I almost know exactly what I'm doing!"

elf
Posts: 1416
Joined: Sun Nov 18, 2007 12:10 pm

Post by elf »

I think the BD threads are the best, but I made another adaptor to fit in 57mm extension tubes. The new adaptor is similar to my adaptor for the JML 26mm lens. The main reason for a new adaptor is to use the lens at lower magnifications.

I removed the base of the lens on a lathe so it is now 18.34mm long. The adaptor allows the lens to extend 5mm past the camera mount into the mirror box. The minimum magnification is about 1.16X.

Image

Image

Image

Image

Image

seed
Posts: 27
Joined: Tue Apr 06, 2010 1:30 pm

Post by seed »

I thought I had replied here, but I guess not.

I wrapped a couple layers of lab tape (similar to masking tape but a bit stickier) around the barrel of the JML and it push-fits snugly in an Edmund optics T>RMS adapter. Cost: roughly $.02.

So I suppose there you have it: My two cents' worth! :)

Sally
Posts: 10
Joined: Sat May 29, 2010 6:12 am
Location: Preston Lancashire England
Contact:

Post by Sally »

I thought I'd replied too!
Craig - I've given up with experimenting with it! It's easier to stick to the Photar. Perhaps I'll have another go in the future - when my hair's grown back...

Pau
Site Admin
Posts: 6065
Joined: Wed Jan 20, 2010 8:57 am
Location: Valencia, Spain

Post by Pau »

My adaptation is with the main body of a chinese microscope camera adapter (branded Sonia, bought in ebay without brand indication and looking the same as this one: http://cgi.ebay.com/Microscope-Adapter- ... 2c5e731e52).
The adapter has a M42 mount and was sold with a M42 to Canon EOS mount.
I salvaged it because I don't use it anymore on the scope.
The 21mm JML lens is mouthed with two plumbery rubber O rings just by pressure, but it fits solid and well alignedImage
Pau

Acon
Posts: 44
Joined: Sun Jul 08, 2012 8:29 am

Post by Acon »

This is my adapter to mount JML 21mm f/3.5 to a 42mm T2-ring (a custom made adapter) by now, please see here:
http://www.photomacrography.net/forum/v ... sc&start=0

kds315*
Posts: 224
Joined: Mon Feb 02, 2009 1:06 am
Contact:

Post by kds315* »

***
-- DO NOT INQUIRE, PROJECT HAS BE DROPPED --
***

I have gotten multiple requests for the adapter I have shown here (same "Acon" uses btw.), so this is a feeler if having another batch of them made would make economical sense (about 10 most likely to bring the price down).

In case you're interested, do let me know per email --> postmaster AT macrolenses.de (NOT using the PM system here)
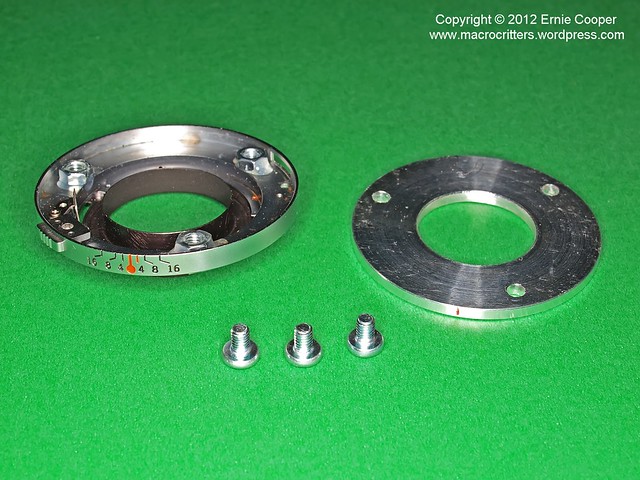
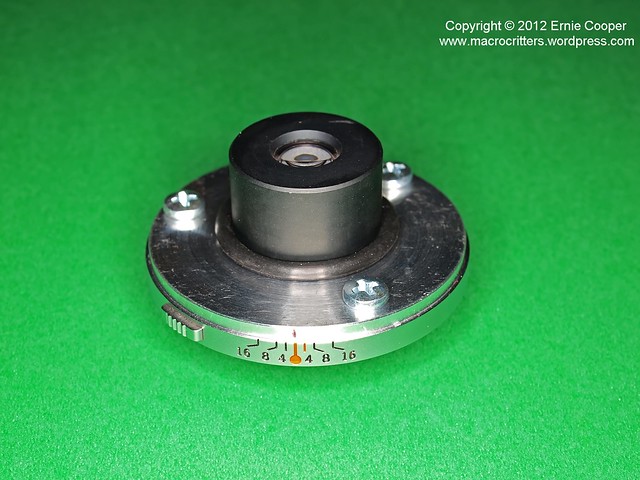
This is it:
Image

Image

Here mounted to a M42-M42 focusing helicoid to adjust magnification (source: 'bay)
Image

Image

using cheap adapters, that solution fits Canon, Nikon, Pentax etc. bodies - you name it.
Last edited by kds315* on Thu Oct 11, 2012 10:54 am, edited 2 times in total.
Klaus

http://www.macrolenses.de for macro and special lens info
http://www.pbase.com/kds315/uv_photos for UV Images and lens/filter info
http://photographyoftheinvisibleworld.blogspot.com/ my UV diary

kds315*
Posts: 224
Joined: Mon Feb 02, 2009 1:06 am
Contact:

Post by kds315* »

Gents,

I'll drop that "project" as it won't be worth the needed efforts...

Sorry,
Klaus

http://www.macrolenses.de for macro and special lens info
http://www.pbase.com/kds315/uv_photos for UV Images and lens/filter info
http://photographyoftheinvisibleworld.blogspot.com/ my UV diary

Ecooper
Posts: 222
Joined: Fri Jul 06, 2012 9:18 am
Location: Vancouver
Contact:

Post by Ecooper »

My need was to mount the JML so that I could use it with an Olympus bellows or Telescopic Auto Tube. I originally planned to use an OM adapter ring purchased off of Ebay. But when it arrived I found that (despite how it was advertised) it was actually meant for the newer 4/3 cameras and not the vintage OM. I could make it fit, but not well, and it wouldn’t lock in place. It was also very thin and light. I wanted something a bit more substantial that would lock in place.

I ended-up buying a junk Zuiko 50mm lens for $5. I dismantled the lens and removed all the apparatus from the mount except for the locking mechanism and the inner flat black baffle. I then had a 1/8” thick aluminum washer made at a local machine shop. The outer diameter just fits into the mount, and the JML 21 just fits into the inner diameter (there is 1/1000 clearance for both). I drilled 3 holes into the washer which correspond in position with three 4mm nuts that I glued inside the mount. The washer is attached to the mount with three 4mm x 6mm machine screws; and the lens is secured in the washer using two o-rings.

Image
JML mount 1 unsharp_filtered by ernie.cooper, on Flickr

Image
JML mount 2 unsharp_filtered by ernie.cooper, on Flickr

Now all I need to do is to paint the washer and screws flat black...

EC
www.macrocritters.wordpress.com

Post Reply Previous topicNext topic